 >painted furniture diy >>hand painted >>rustic pine >> distressed >> colorful furniture” width=”1000″ height=”1200″>
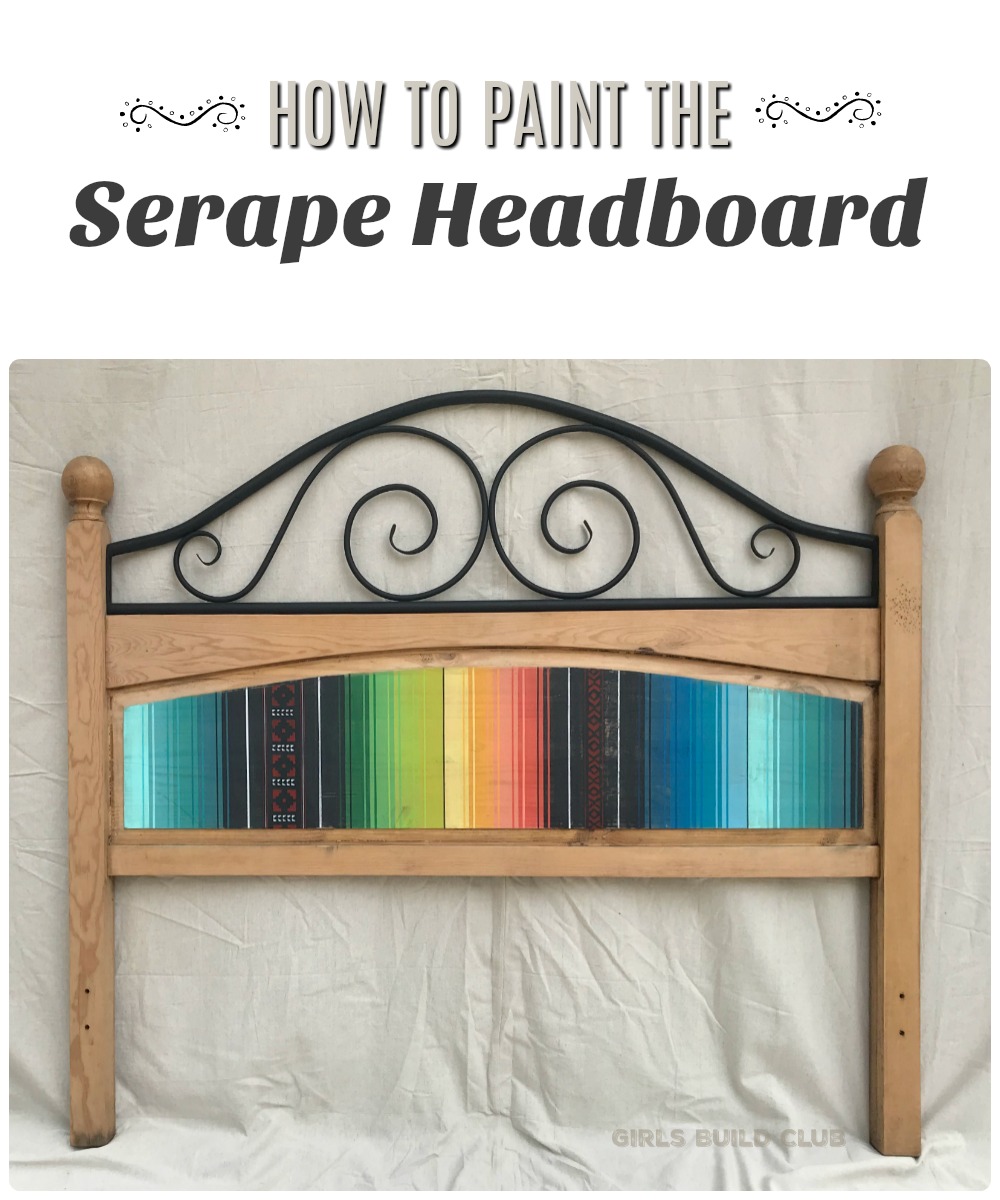
How to Paint the Serape Headboard
This is one of my favorite projects to date, you guys! I’m so excited to show you how to paint the Serape Headboard! I don’t know what it is, but the colors just make me so happy. Every time I paint a serape-inspired piece the rainbow-like colors bring me warm fuzzy feelings of sitting in the sun on a beautiful beach somewhere. Am I crazy or do you get the same feels? 🙂
Okay, so this is technically an easy piece. It is by no means difficult to paint. However, it takes a lot of time and patience, and a heck of a lot of painter’s tape. But other than that, it is truly easy to paint the serape headboard. You don’t need special skills or talents because I’ll tell you exactly how I did it. Having said that, I know it looks daunting. This might not be the best serape project to start out with. I did a much simpler version of the serape pattern on this jewelry organizer. You could always get a feel for it with the jewelry organizer and then try your hand at the headboard once you’ve gotten one under the belt.
Overview:
Time: 4-6 hours
Difficulty: Easy
Cost: $30
Inspiration:
I am particularly fascinated with all kinds of folk art. I don’t care where it’s from, I love it all! Whenever I travel, one of my favorite parts of a region’s culture is their traditional folk art. In recent years I’ve become more and more in love with the mix of folk art you see in modern southwestern style decorating. It really runs the gammut, borrowing from turkish kilims, navajo geometrics and woven goods, mexican patterns and embroidery, and on and on!
I decided I had to try my hand at painting a woven blanket inspired design. The design I came up with is a combination of things I’ve seen. I looked at a Mexican serape blanket as I planned mine out. The geometrics I added are from stencils I bought at Hobby Lobby. Anyway, all this to say, my design is only inspired by what I’ve seen and admire, and isn’t an authentic folk art design.
Right around the time I decided to do a painted blanket design, I was shopping through Goodwill and found this beautiful Mexican blanket. This is what I looked at as I planned out my serape-inspired design…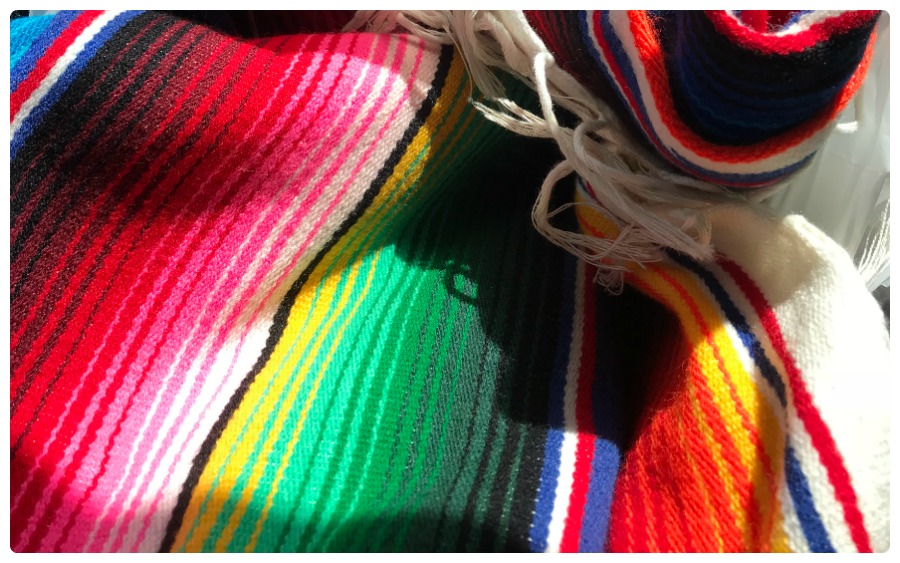
I think I got a steal on this beautiful serape. It feels like wool and only cost $4.00!!! I love treasure hunting at thrift stores.
The headboard you see in this project is something we’ve had for a few years. It came with the house we bought and it’s been sitting out in the shed until now. If you don’t have a headboard to paint you can always build a simple one or find a pretty cheap one at a thrift store. I usually find several decent headboards anytime I’m at a Habitat Re-Store.
Supplies:
Some of these links are affiliate links. As always, I only refer you to the products I like to use myself, and your price doesn’t change because it’s an affiliate link.
- Elmer’s Painters Pens
in red and white. I use these pens all the time and prefer them over Krylon brand.
- White pencil, $0.99 in the sewing section of Hobby Lobby
- Southwest Stencil
- 3M Painter’s tape for brick/stucco/concrete in 3 sizes: 1″, 1.5″, 2″ You can find this at any hardware store.
- Pack of 25 foam brushes
- Big water bowl or bucket for dirty brushes.
- Apple Barrel Matte Acrylic Paint, 2 oz. bottles ($0.50 each) from Walmart, in 18 colors:
- Black
- White
- Key West
- Caribbean
- Laguna
- Tuscan Teal
- Christmas Green
- Spring Green
- Lime Tree
- Kiwi
- Sunny Day
- Apricot
- Tropic Orange
- Ripe Tomato
- Too Blue
- Bright Blue
- Turquoise
- Pool Blue
Plan Out Your Design
Before we start painting, let’s plan out our design and get organized. It will make the whole process go a little bit more efficiently.
I start by grouping my paint colors and putting them in order that they will appear on the headboard.
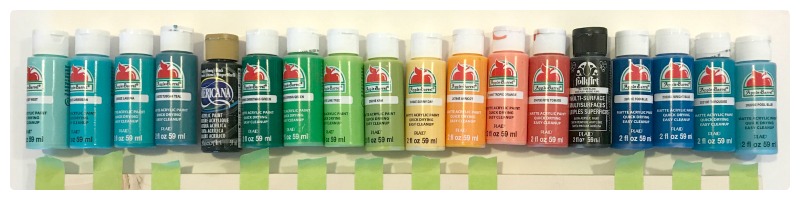
The picture above shows the general order, but since the headboard is so big we will start to repeat the pattern by adding the first teal colors on to the end, after the blues. So the teals will show up twice on the headboard – at the beginning like they are in the photo, and again at the end.
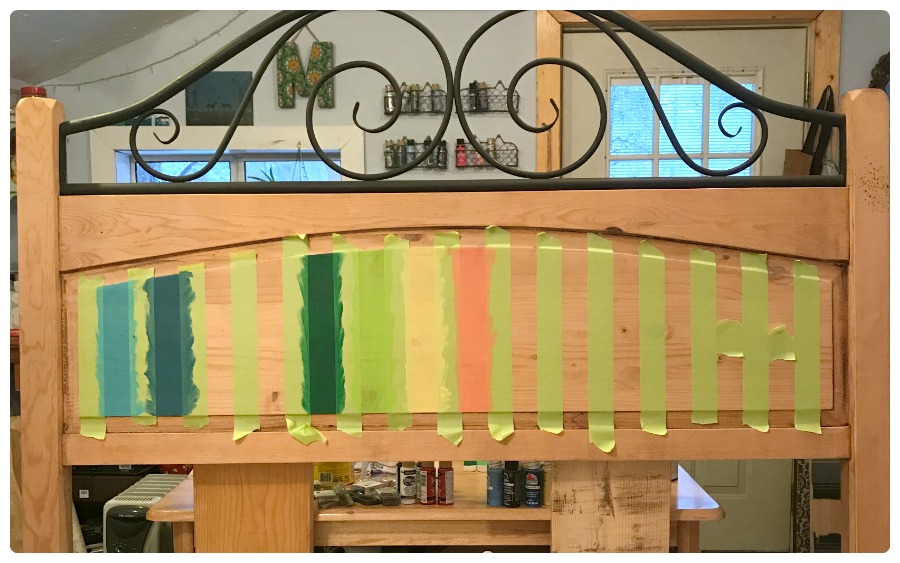
Next I tape out my design in stripes. I don’t like measuring with a ruler so I use little bits of tape as a measuring unit and to get perfect spacing. As far as keeping the lines straight up and down I usually just eye it and am constantly comparing my tape lines to the side edges. If you aren’t comfortable with “winging” it, you could measure it out with a ruler. I just don’t have the patience for that! 🙂
With the widest of the painter’s tape, I tape alternating stripes all across the headboard. Like this:
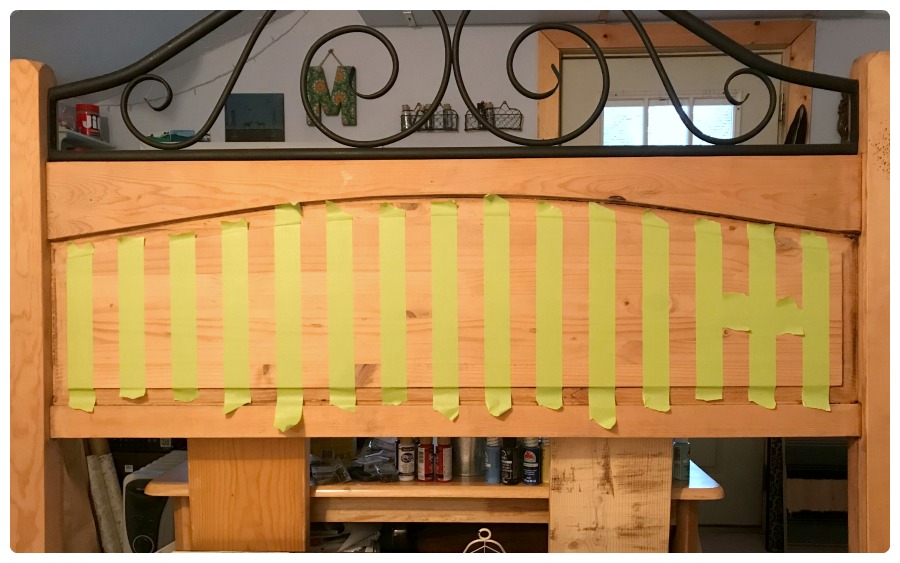
If I had planned out this a little better and used a ruler to begin with I wouldn’t end up with that little half inch of blank space at the far right. Since usually distress my projects at the end, I can disguise little mistakes like that. But if you’re really picky about things like that, then measure it out!
With the first lines of tape up on the headboard, I start figuring out how many lines of black I’ll need in order to end the pattern after a completed band of colors. I don’t want to end it in the middle of a color run, so I just add or subtract black stripes until it spaces it out perfectly.
Then I start painting! And even though I’ve planned it all out, I usually make a mistake at some point and have to paint over it. But that’s the beauty of paint! It’s never permanent. You can just paint over it.
Paint the Serape Headboard
 In this picture above I’ve started painting in all the bare wood areas. I have a bucket of water next to me, and 25 foam brushes. I paint a stripe and put the dirty brush in the water bucket. Eventually, by the time I’ve tired of painting for the time being, I’ve got a bucket full of dirty foam brushes. I wash them all at once, set them to dry in the sunny window, and by the time I feel like another round of painting I have 25 clean dry brushes.
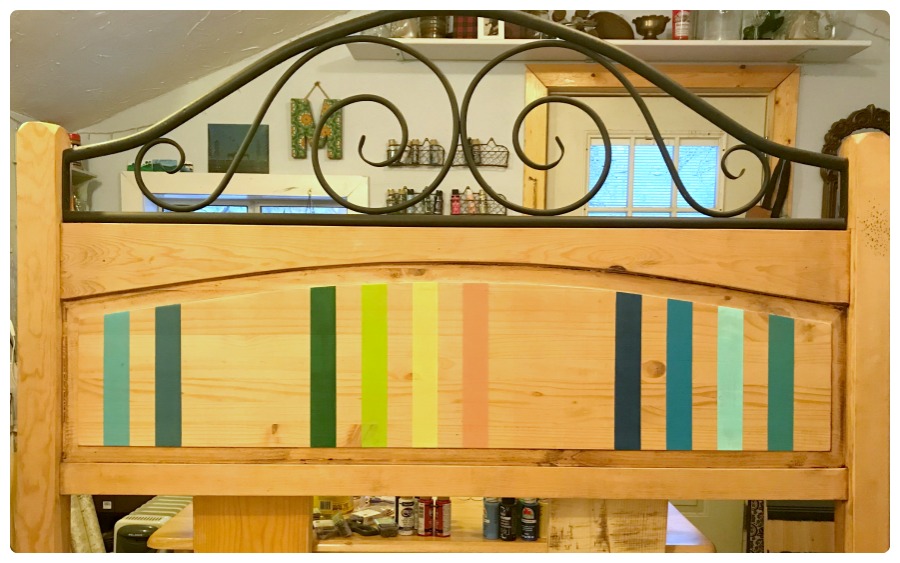
Sorry, the photo lighting is pretty bad indoors!
After I’ve painted all the bare wood stripes, I immediately remove the tape. Do it before the paint is fully dry. This will minimize jagged edges due to the paint getting pulled up with the tape.
Wait a couple hours or more for your first paint stripes to dry. Then you can tape directly over them and start painting bare wood again. This is my favorite step because the serape pattern really starts to look pretty here. Remove your tape and this is what you get…
That bare stripe between the red and black you see above will get painted black.
Again, wait for it all to dry.
Now that we have the base stripes on the headboard, we’ll start adding all the little details. Those base stripes go pretty darn fast. But from now on it gets a little tedious. Work in manageable sections, take breaks, and just have fun with it!
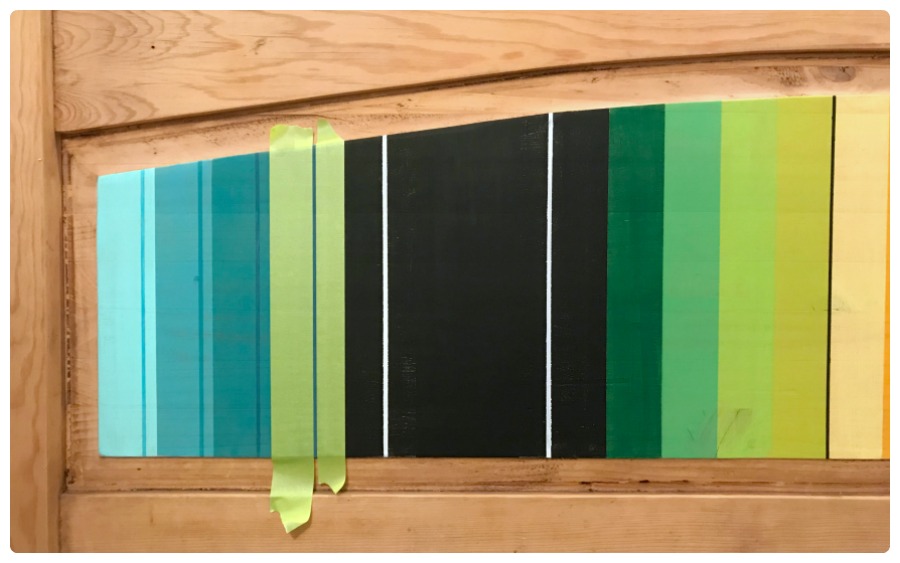
Here I am adding the little tiny stripes of white and black to define the focal points of the pattern. The contrast of the thin white against the black draws your eye to it.
After the tiny white and black stripes have been added the headboard looks like this:
For some reason, certain paint colors seem to lift up with the tape more than others. For example, in the photo above you may be able to see how the black paint is getting a little thin. It comes off a little bit every time I peel the tape off. That’s because I’m using cheap craft paint and it’s not meant to adhere perfectly to bare wood without a primer. In my case I don’t mind, because I will distress this headboard at the end anyway. If you do mind, then you’ll want to use higher quality paint.
It’s time for all the tiny colored stripes! For this I use the 1 inch tape, and align it to the edge of a big color stripe. Then I use another piece of tape to define the opposite side, but that second piece of tape I just place by eye. Paint the thin stripe with the color that borders that large color stripe. In this case we are doing the colors that border it on the right side.
I know this can get a little confusing. Trust me, I’ve done this pattern several times and I still lose track of what color I should be painting in between those tiny lines. Here I’ve got one side of the little stripes finished…
Are you pulling your hair out yet?? Hang in there! It looks soooo good when you put the time in to do all the little details. We are almost there!
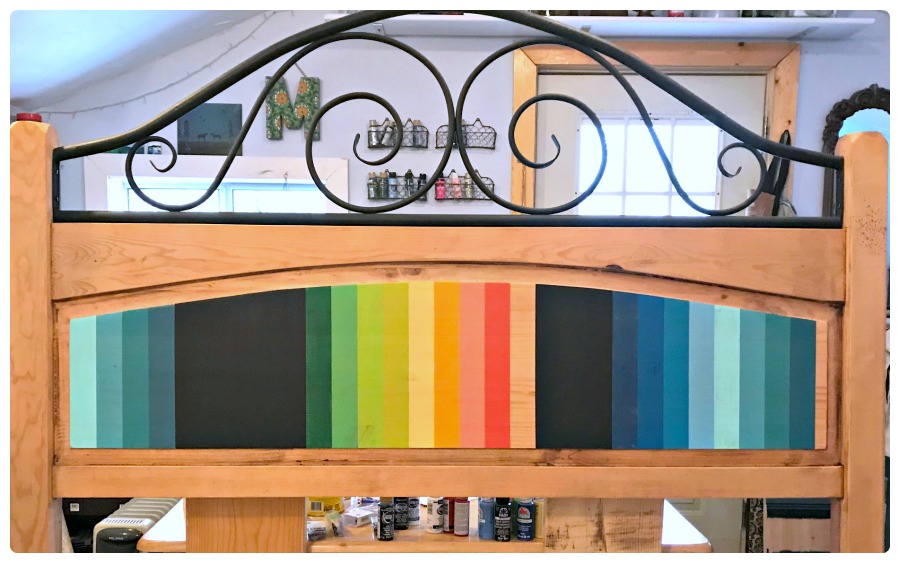
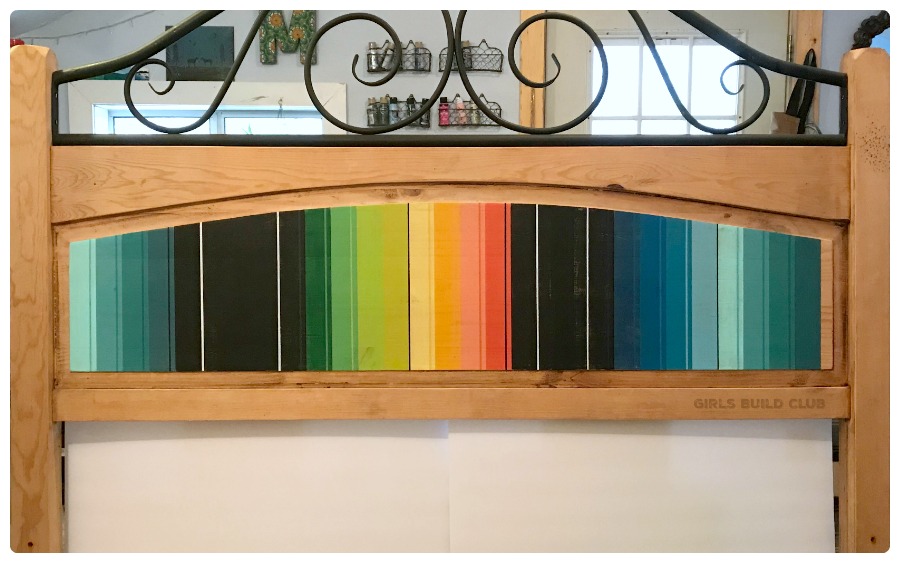
Do one more set of the tiny color stripes, this time aligning your 1″ tape to the other side of the large color stripe. It will look like this when you’re done with all your stripes:
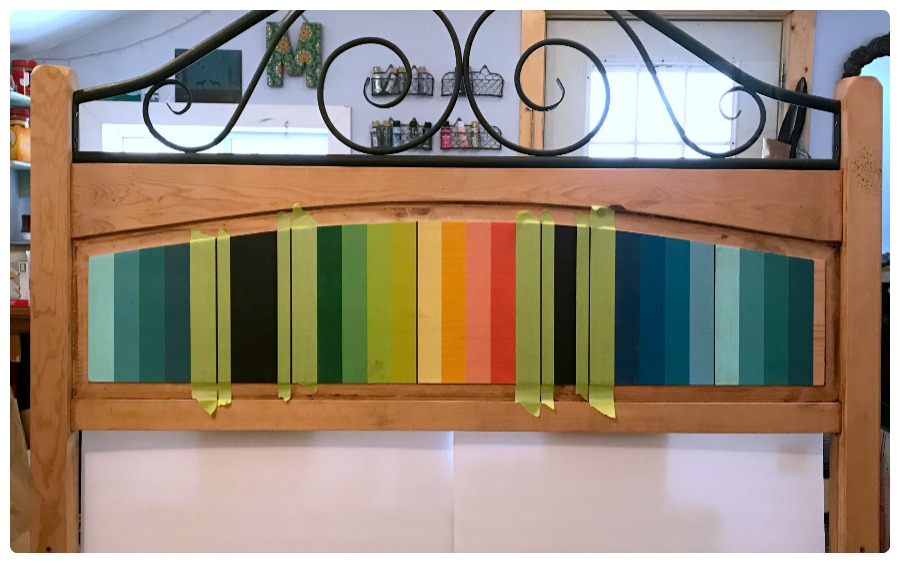
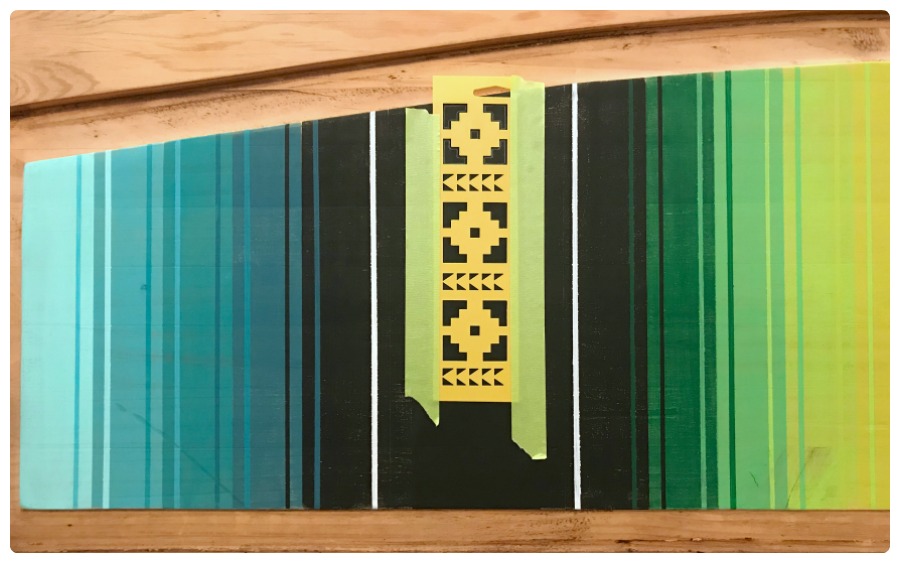
Add The Stencil Elements
The final step is to add the stencil elements in the black areas. This will give the headboard a true focal point, somewhere for the eye to rest. Without it, the eye just runs back and forth across all those stripes, over and over again. It’s kind of mesmerizing! The stencil design pulls it all together and makes it feel completed.
I do this by taping the stencil in it’s proper place. Using my white pencil I outline the design onto the headboard. With the white outline in place I use my Elmer’s Painter’s Pen to fill in the design. I find this easier than using brushes and paint to fill in the design. Fewer mistakes for me!
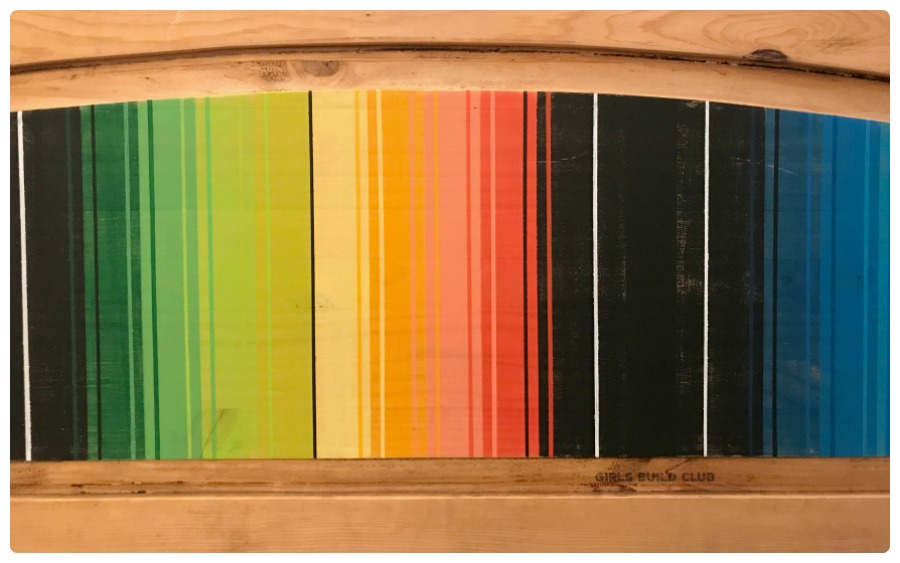
After using my paint pens to fill in the outlined design, I went back in and added some thin border stripes:
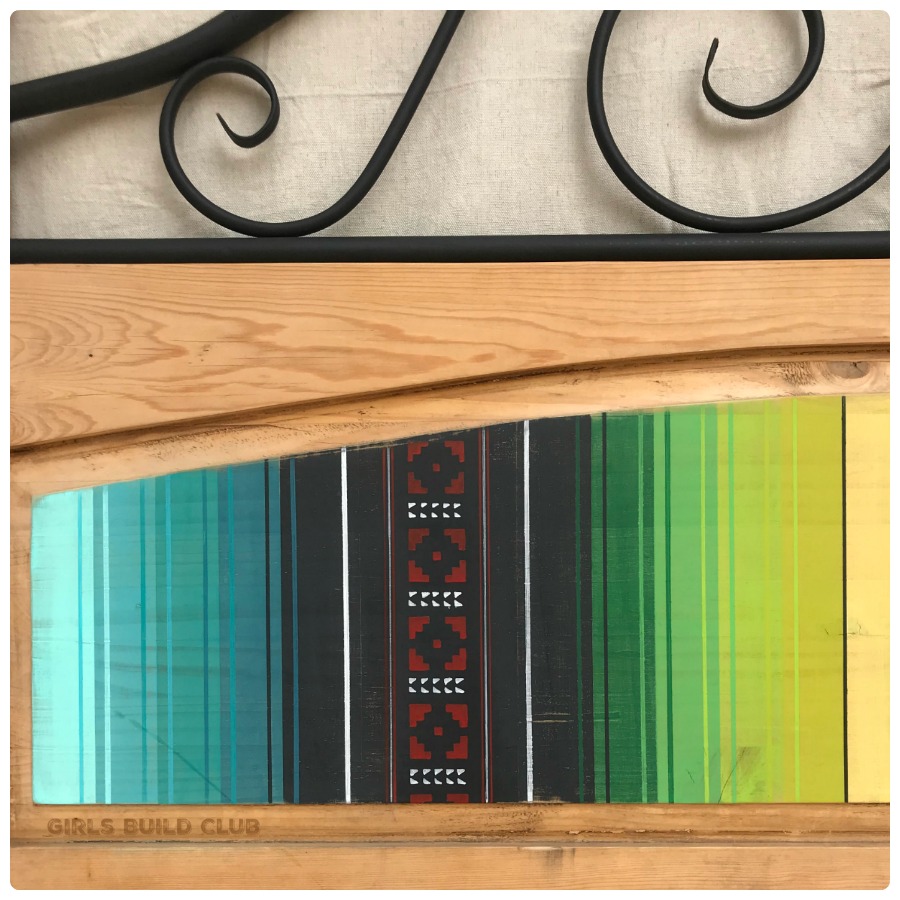
Do the same design or use another element from your stencil to add some geometrics to the other black area.
Once I’m done painting and stenciling, I go over it all with 100 grit sandpaper. It smooths down the edges of the painted stripes and generally softens up any mistakes.

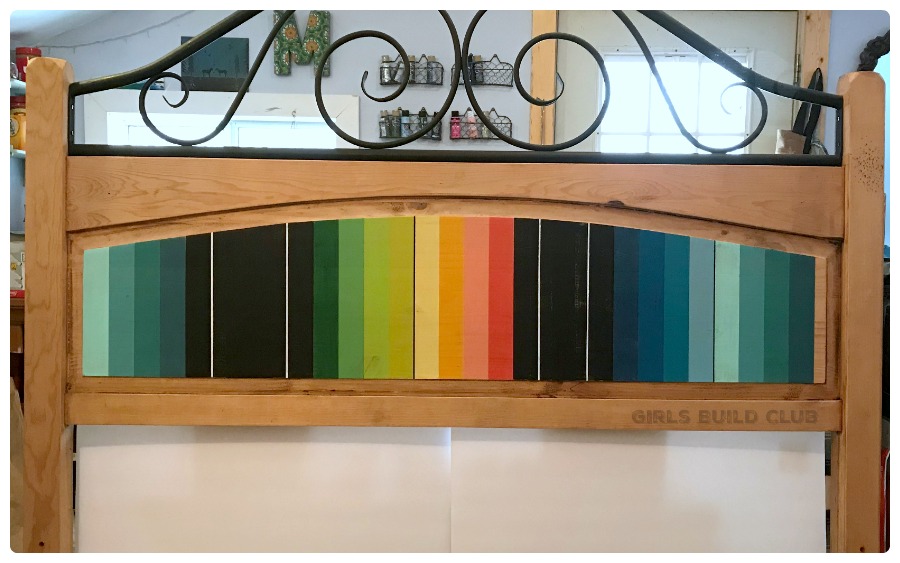
It’s finally done! What do you think? If you try this, will you make any changes to the design? Maybe try out some different colors? I’d love to see what you do!
Pin this project for later so you’ll remember it when you have time.
One oof the more original diys I’ve ever seen, simply gorgeous!!!!
Thanks, Amanda! That’s really nice of you! ????
Oh my goodness, I love love love this! I am making an ofrenda for Dia Di Los Muertos out of a repourposed corner shelf i got off a facebook forsale group. I knew I wanted to make the doors look like a mexican blanket but didn’t know how to get started. This has helped me so so much. I’m using a different color spectrum, and I’m only at the first set of original stripes but you have made the painting process of this so easy. Best tutorial that was not a video I’ve ever read. (I say this before doing all the tiny lines, so watch for a follow up SOS)
Kristin, I’m so glad you found it helpful! I’d also like to do some more of this pattern on other furniture pieces with new color schemes. I REALLY hope you take lots of pictures and share them with Girls Build Club. 🙂 I’d love to see it. Just FYI, because of all the tiny stripes and tape, it is easy to get lost and paint the wrong color. But that’s easy to fix! Just paint right over it. I seem to do it every time I attempt this paint design. haha. Anyway, good luck. I know it will turn out beautifully! ~Liesell
Beautiful. And an excellent, step-by-step tutorial. Thank you!!
Thank you, Kris! I really appreciate your comment. Hope you try it!
I enjoyed this being that I did mine all freehand. A table was left behind at the new place we are renting. I decided it was time to get back into my art after a 26 YEAR break! The table is now a joy to look at and didn’t end up in a land fill! I enjoyed every moment of it…. even the moments of ‘what do I do next?’. Great tutorial! I get tired of those who show you the typical 1,2,done…. as if so many of us ‘just get it’…. pictures really ARE worth a thousand words!
That’s awesome, Sharon! I’m so glad you found it helpful. Those stripes are so mesmerizing that it’s hard to see what is done at each step, but I’m happy you figured it out. I would love to see your finished project! Take care and thanks for stopping by!
So… you inspired this… IMG_3752.jpg
Thank you so much!!!! Awesome tutorial
I guess you can’t see the picture but it is a door to a cabinet that I painted, with your direction, like a Saltillo rug and I love it thank you
Dang I wish I could see it!! Thank you so much for telling me about it, though! I bet it turned out beautiful. That’s such a cool idea to paint a cabinet this way ❤️
I guess you can’t see my picture but it is a door to a cabinet that I painted with your direction like a Saltillo blanket and I love it thank you
I get confused with the second line of paint. Place the 1 in tape to the other side of wide color and paint in what direction and what color?
I know, it’s confusing! The first tiny stripes we added to the right edge of the thick base stripes, right? Now we are adding a tiny stripe to the LEFT edge of the thick base stripes, in the same color as what’s next to it on it’s left side. So for example, go up a couple photos and look at the thick stripe that is the dark grass green color. On it’s right side it has a thin lime green stripe. On it’s left side it has a thin black stripe. I hope that helps!! 🙂
Ok! I got it now! Thank you so much for that explanation!
Awesome! I’m glad that helped. 🙂
How do I send you a picture
Oh did you finish?! I don’t think you can post it in the comments unfortunately. You can email me though! Girlsbuildclub@gmail.com I’d love to see it. And if you don’t mind I may post it to show others, if it’s okay just say so in your email. Can’t wait to see it!