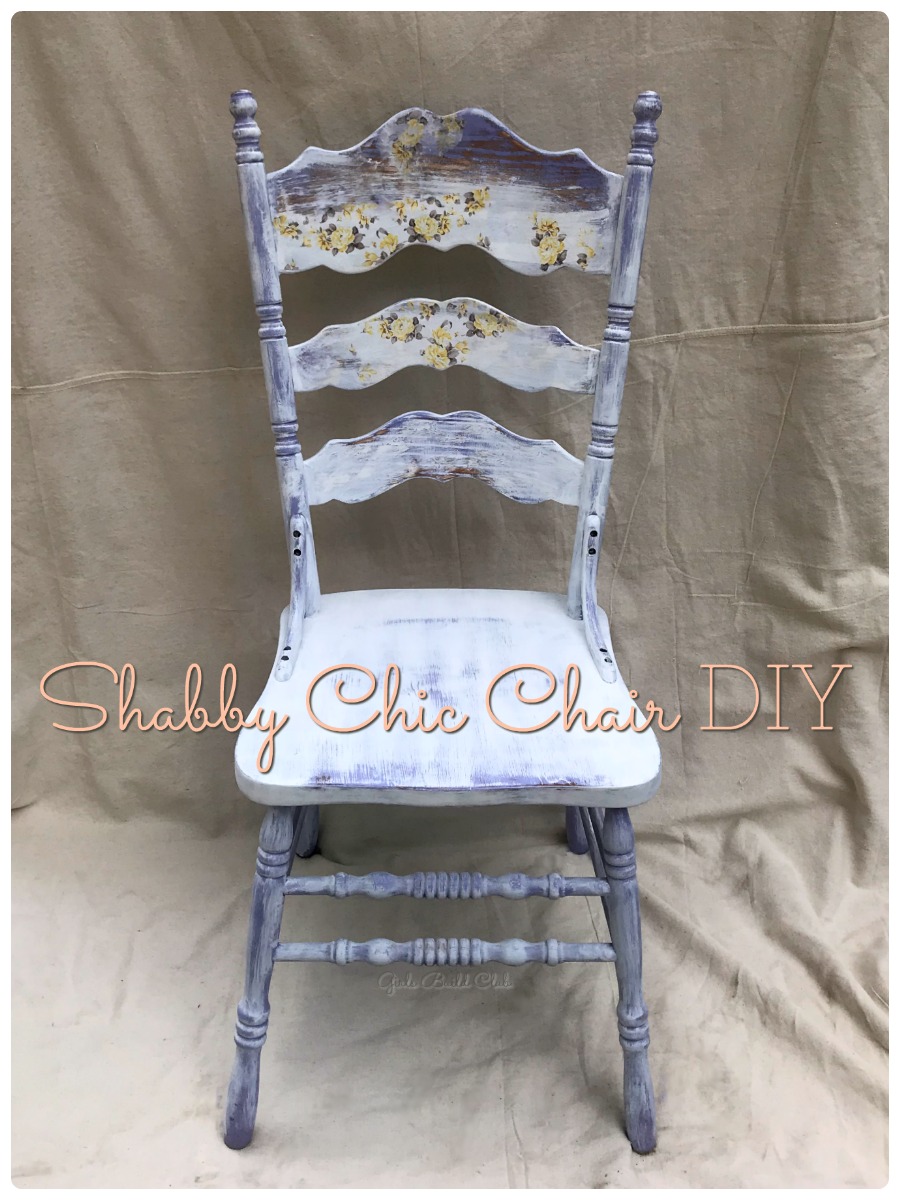
Today’s project, the Shabby Chic Floral Chair DIY, wasn’t even on my “to do” list. Yes, I have been wanting to experiment with decoupaging napkins, but I didn’t plan on doing that with this chair. It was very spontaneous how this chair came to life (or should I say- came to it’s second life). But it did, and I’m going to tell you all about how I did it, so you can replicate my steps. Then you’ll be able to turn some old chair you’ve got sitting around into something fabulously floral and distressed!
Overview
Time: 3 hours
Difficulty: Easy
Cost: $5
Supplies
Some links in this post are affiliate links. When you make a purchase through the link I might receive a small commission that helps to pay for this blog. Thank you in advance. I appreciate your help!
-
- One old chair
- White craft paint
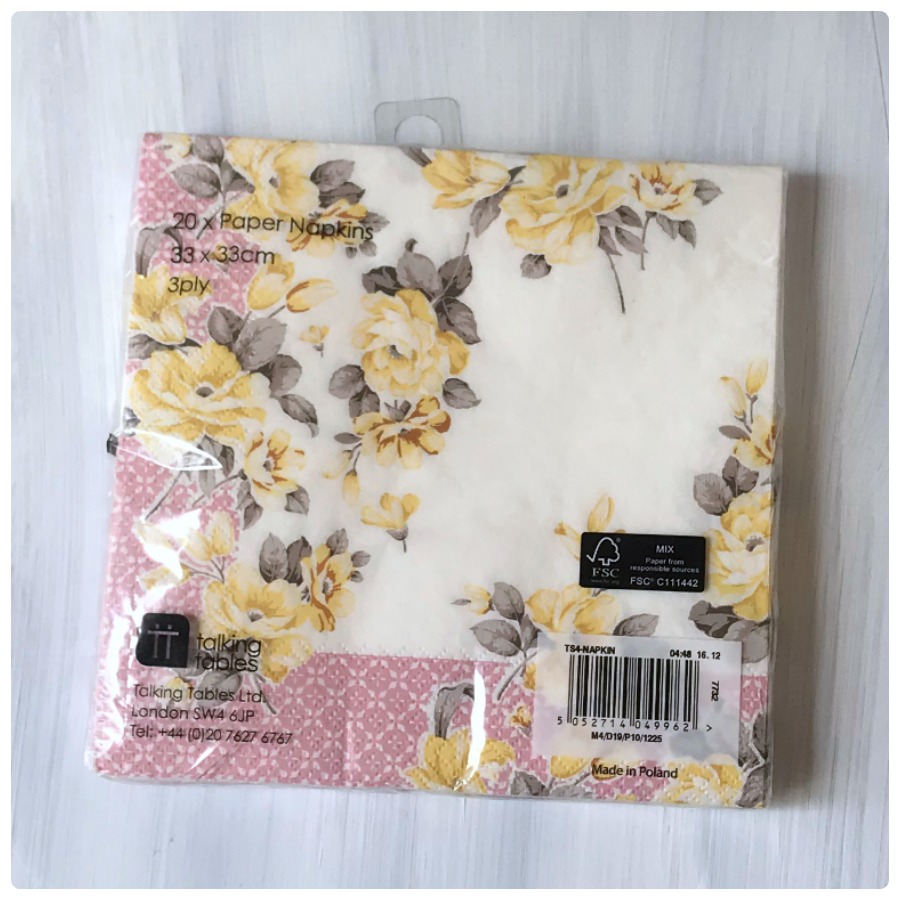
- Floral napkins
by Talking Tables on Amazon. <– That is my affiliate link.
- Mod Podge Matte
- Sanding sponge / hand sander
- Cheap paint brush
- Optional – clear coat
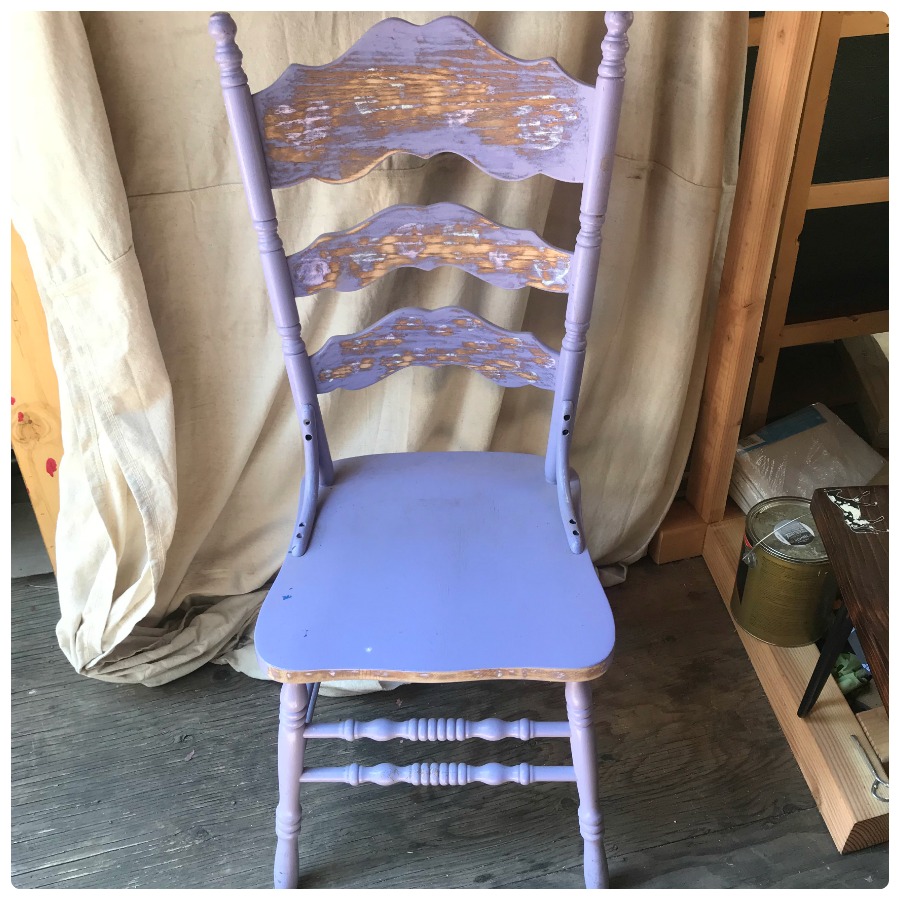
I have had this ugly lavender chair sitting in my shed for about 3 years now. Someone had stamped painted pink hearts and blue spirals on the chair back and front of the seat. To each his own! I saw a canvas waiting to be re-painted! 🙂 I started by sanding off the hearts and spirals. The paint was so thick that it made raised shapes, and that would have shown through even if I painted over it with another color. So off they went! And that is where this tutorial begins… because I forgot to take a picture before I started sanding. Sorry!
 In my mind, I think of shabby chic style as having a mix of rustic and feminine elements. The furniture is usually layered in different pastel paint colors from years of use. It has a decent amount of texture from wear and chipping or crackled paint. And there’s typically a presence of floral or lace. So I figured this chair was the perfect candidate because it already had a pastel base color. Now to add the other shabby chic elements…
Instructions
-
- Sanding
- Painting
- Decoupaging the napkins
- Final sanding
- Clear coat if desired
First I sanded the raised areas down, like I mentioned above.
Painting the Chair White
Then I took a bottle of cheap craft paint, squirted a bunch on the seat, and just started painting it sloppily all over the chair. The seat was my painter’s pallet and I kept dipping back into it to re-wet my chip brush.
When I say sloppily, I really mean I slapped the paint on! I brushed over everything really quickly, not pressing it into the texture, but just skimming the tops of all surfaces. I tried to do some variation in how heavy I painted different areas. You’ll see that the legs got the least white paint, and the seat is pretty well covered.
After the first coat, this is what the chair looked like: 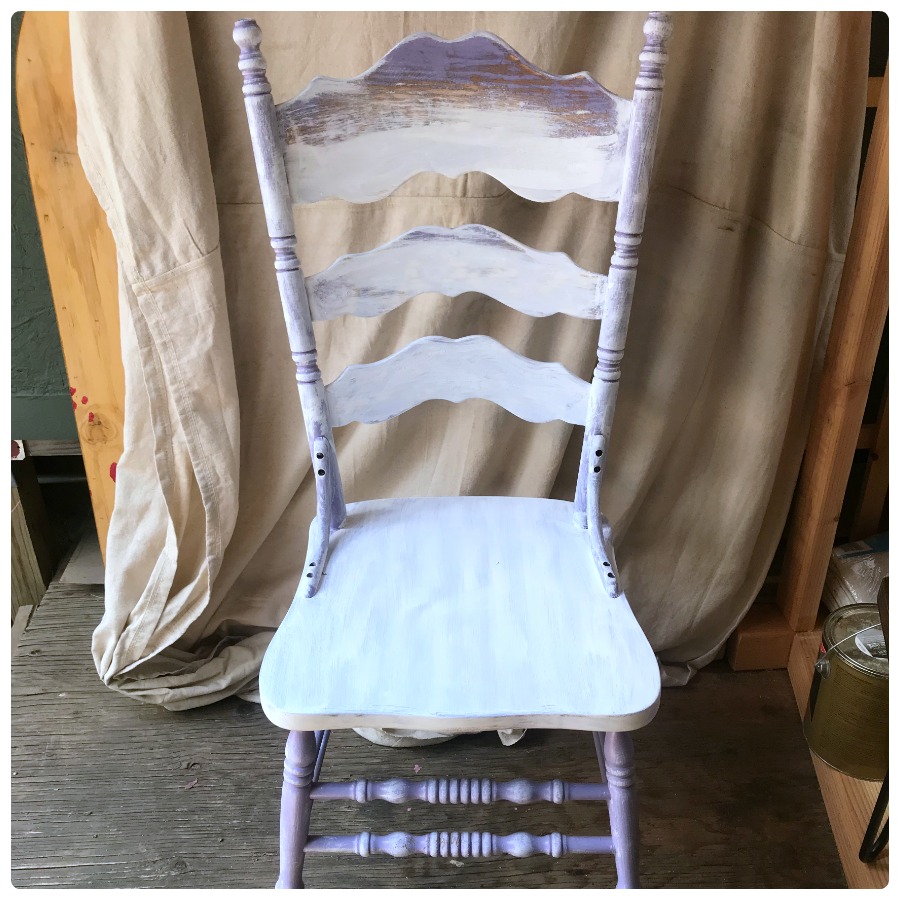 I liked the way the texture of the bare wood mixed with the lavender paint on the chair back. So I left that unpainted.
Next I took some more white paint, but I watered it down a bunch and brushed over the chair again to soften some of the texture and make a more layered look.
After painting the chair white, I took a sanding sponge and lightly sanded down the whole chair.
Then it was finally time to try decoupaging the napkins!
Decoupaging the Napkins
These are the floral napkins I bought:
Most craft stores like Hobby Lobby, Joann Fabrics, and Michael’s carry a wide variety of paper napkins. Choose your favorite design and start planning a project to decoupage!
My paper napkins were two-ply, so I started by separating the two layers.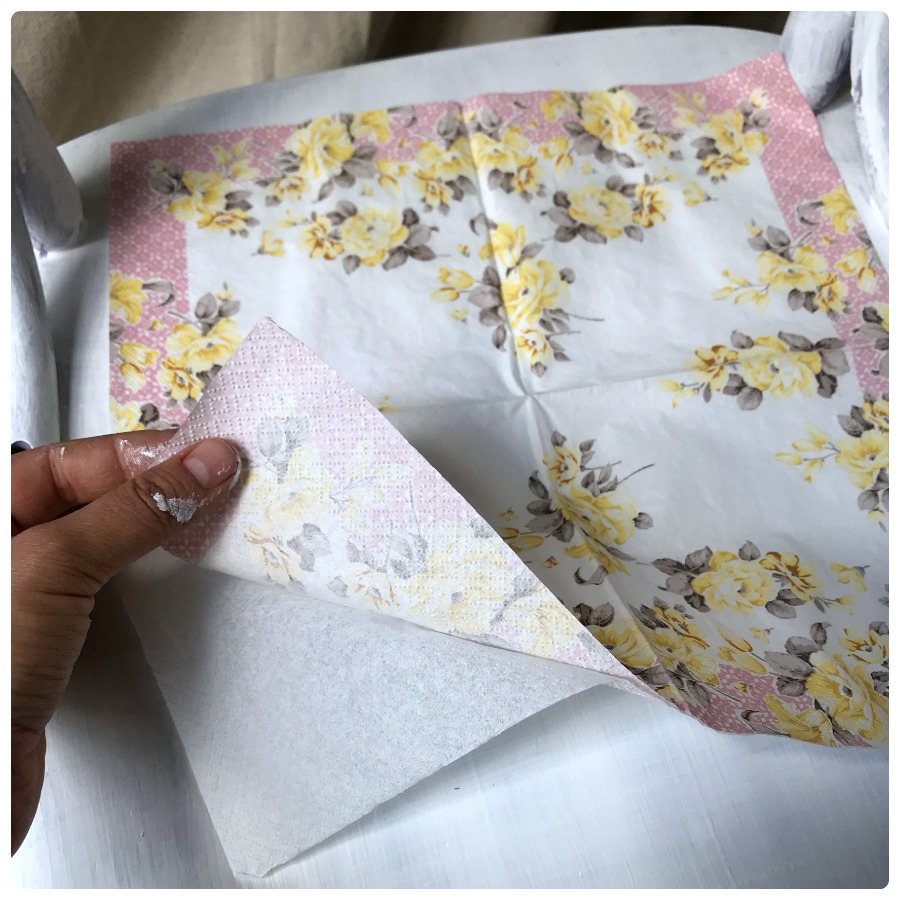
The pink border around the design didn’t really go with my color scheme so I started tearing off the pink border. Don’t worry, the teared edges will look better than a cut edge for this purpose. If you cut with scissors the edge of the napkins will be more noticeable when you glue it to your chair.
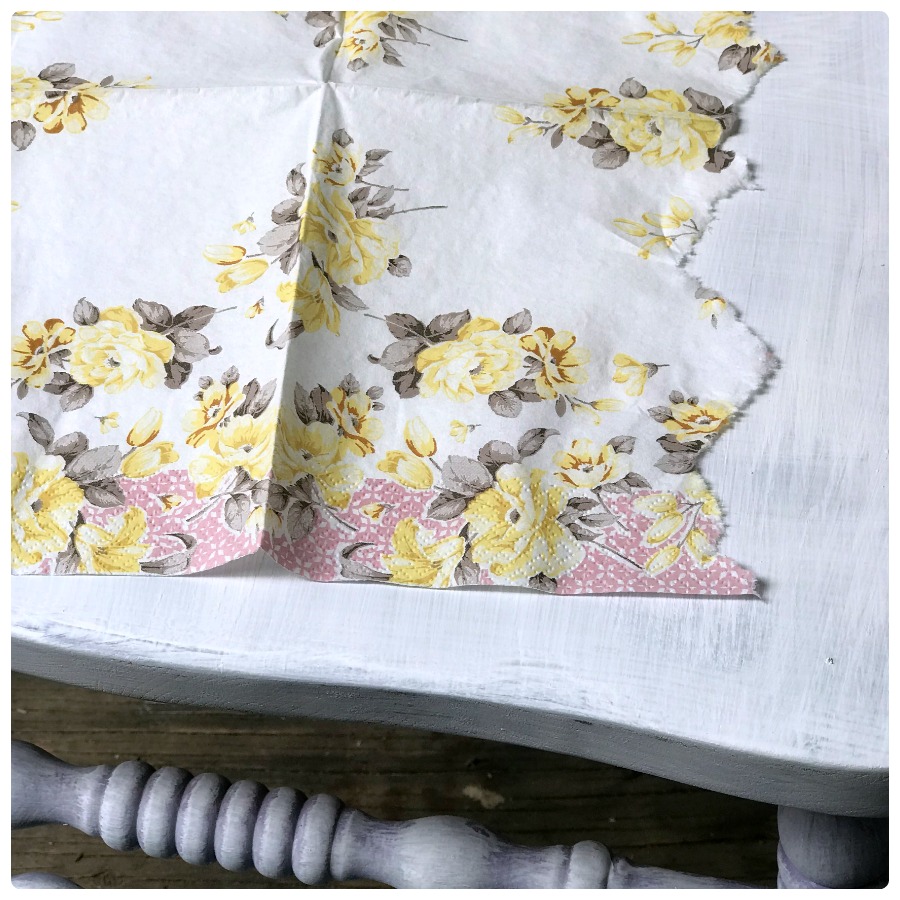 Once the floral napkins were torn to the right shape I was ready to start decoupaging.
First I dipped my cheap chip brush into the mod podge and brushed it directly on the chair where I was about to place the napkin. You don’t need to apply very much mod podge at all! Just a light coat, spread evenly.
Then I gently pressed the napkin on the mod-podged area and quickly smoothed out any bubbles or wrinkles. You’ll want to do this part quickly because as soon as the napkin absorbs the moisture from the glue, it will fall apart and rip when you try to smooth it out. Which actually isn’t a big deal because we are going for a “shabby” look and you’ll distress it at the end anyway! But I still try to save the distressing of the chair for the end. 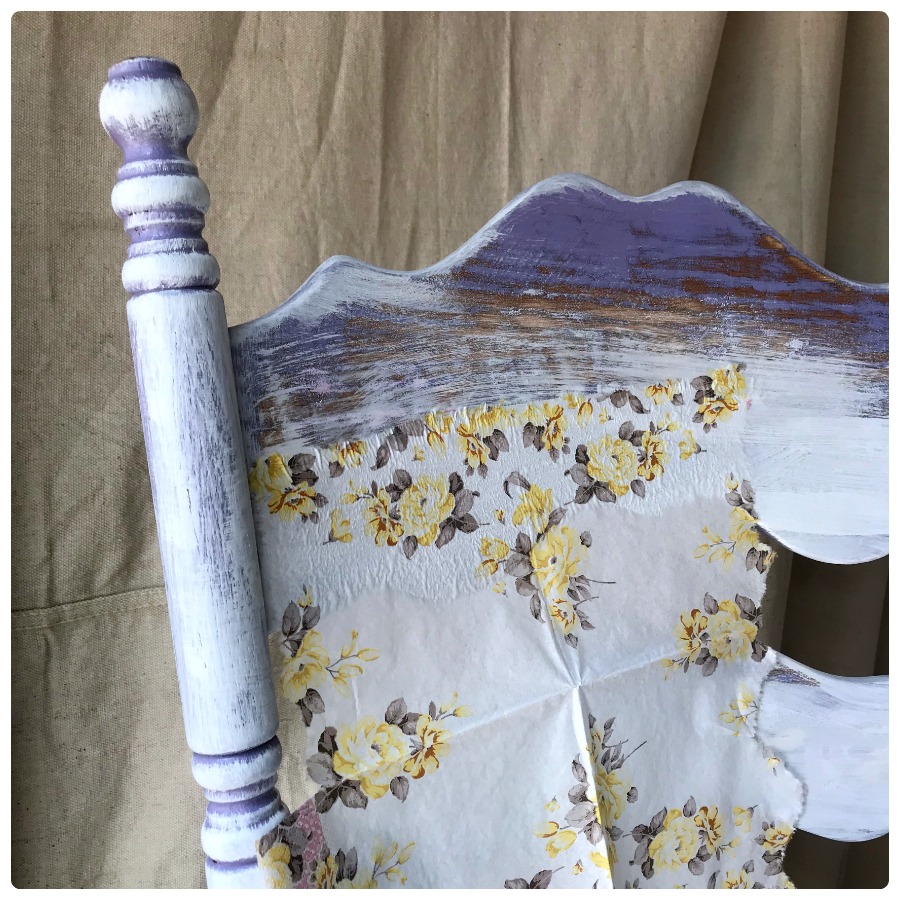 Can you see how much texture the paper napkins have? They kind of wrinkle up and get lots of bubbles as you decoupage. Don’t stress! It’s normal. Just let it be. It will look AMAZING at the end.
After gluing the napkins on, I began trimming off the extra with a craft knife.
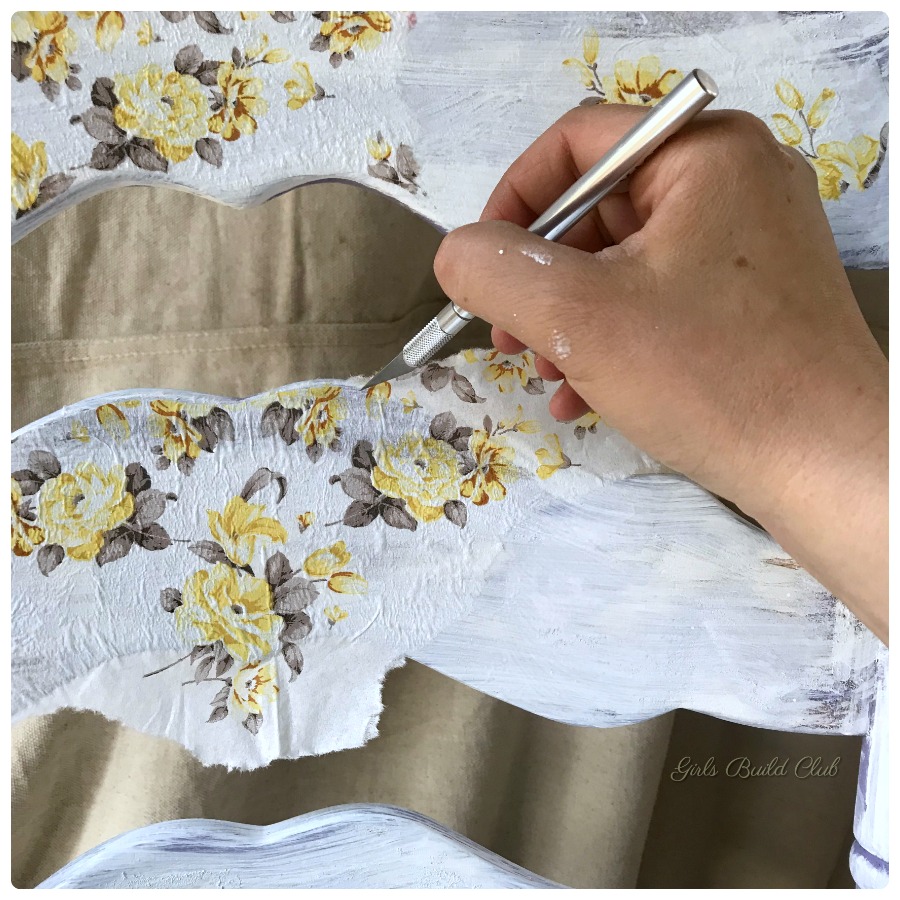 The paper was wet as I trimmed, so it ripped easily as I dragged the knife across the paper. But as I said before – don’t worry! It’s all perfect of the imperfect beauty of the shabby chic style. (Kind of like us humans, eh??)
For the chair, since it was my first project I decided to go sparingly on the floral elements. Sometimes less is more (but not always!). So I stopped with just a few areas on the chair back, front and back.
Wait for all the paint and decoupaged elements to fully dry before you start sanding.
Sanding the Chair
Finally I took my sanding sponge and sanded over everything! I rubbed the chair legs, all the textured/carved areas, even the mod-podged napkins.
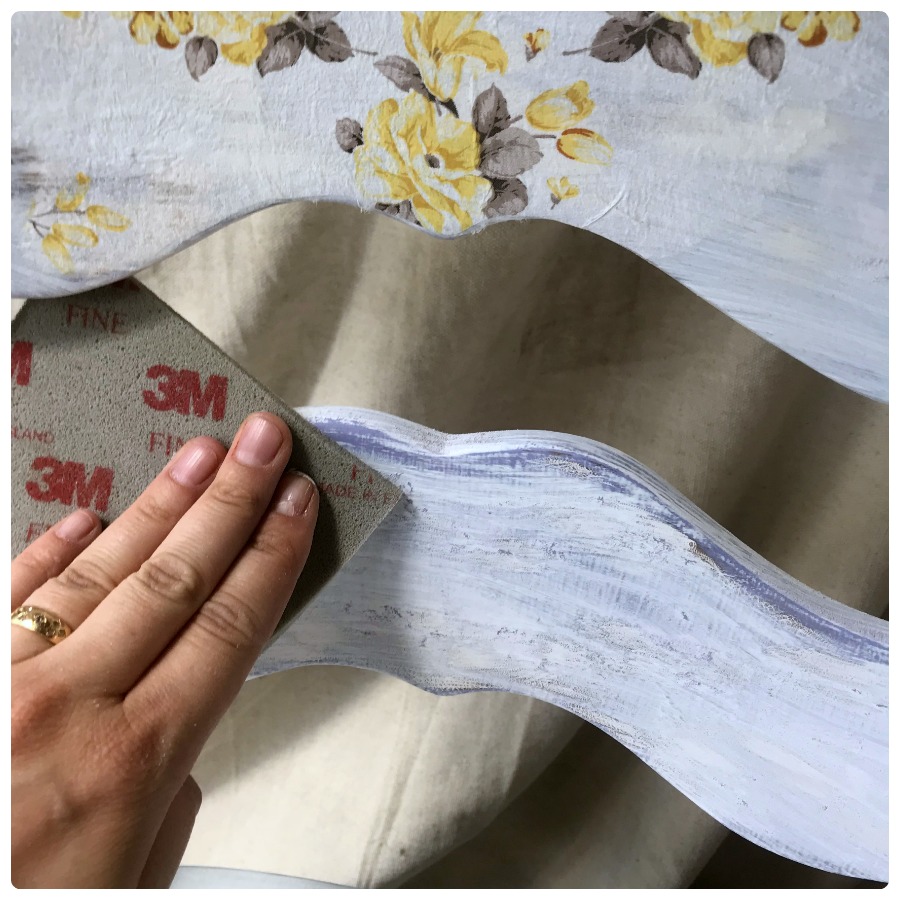
I focused on sanding the areas that would naturally get worn down with years of use – anywhere on the edges, seat, and back rest. In this photo above, I’m sanding down the backside of the back-rest.
Here you can see the front of the chair after it’s been distressed by sanding: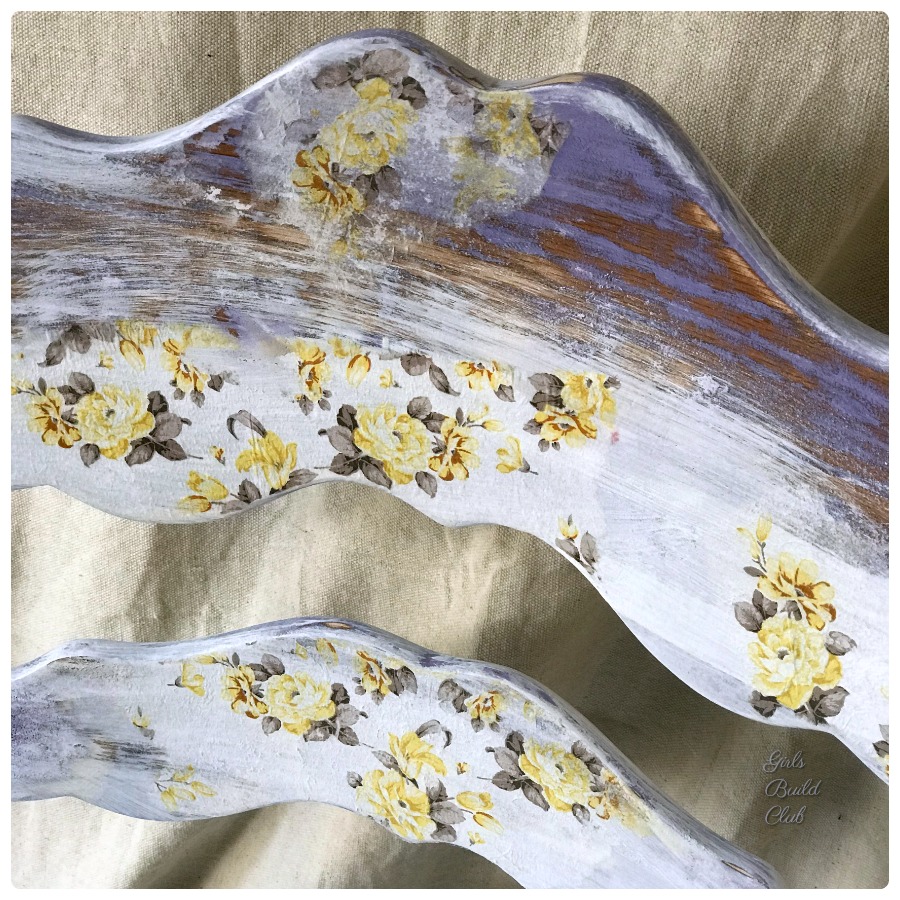
Seal With A Topcoat
After sanding it all down, it’s optional whether you add any topcoats. You can add clear wax, antiquing wax, polyurethane, etc.
I think for this project I’ll add a clear water-based polyurethane over everything. That way the paper napkins won’t gather dust and dirt and I can more easily wipe it down with soap and water. Also, it helps protect it against normal wear and tear.
So what do you think? It’s pretty easy to turn an old chair into something pretty and shabby chic, right? What I love about this project is you don’t have to be exact on anything you do or apply! It’s all slapping on paint, ripping up napkins, and then purposely sanding off paint and ageing the chair. You can’t go wrong with it. 🙂 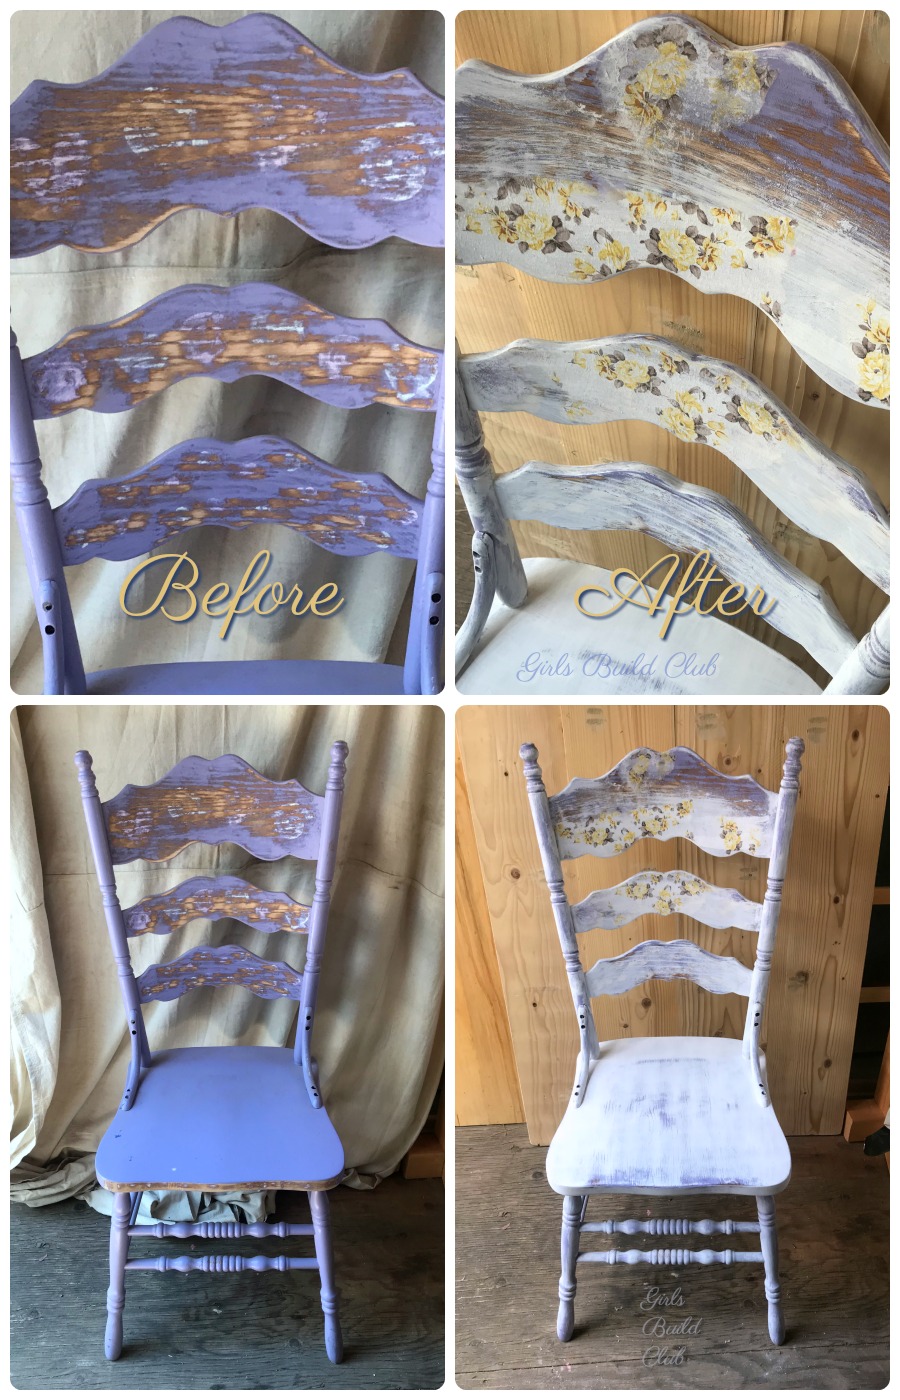 Do you have any old chairs or furniture lying around the house? Well start shopping for the perfect paper napkins to try your hand at decoupaging. Leave a note and tell me how it goes, or even better, post a picture below.
Pin your favorite image from this project to save it for later. 🙂
If you’d like to stay in touch and be notified when I post new projects, then feel free to sign up for the newsletter below. Thanks for reading!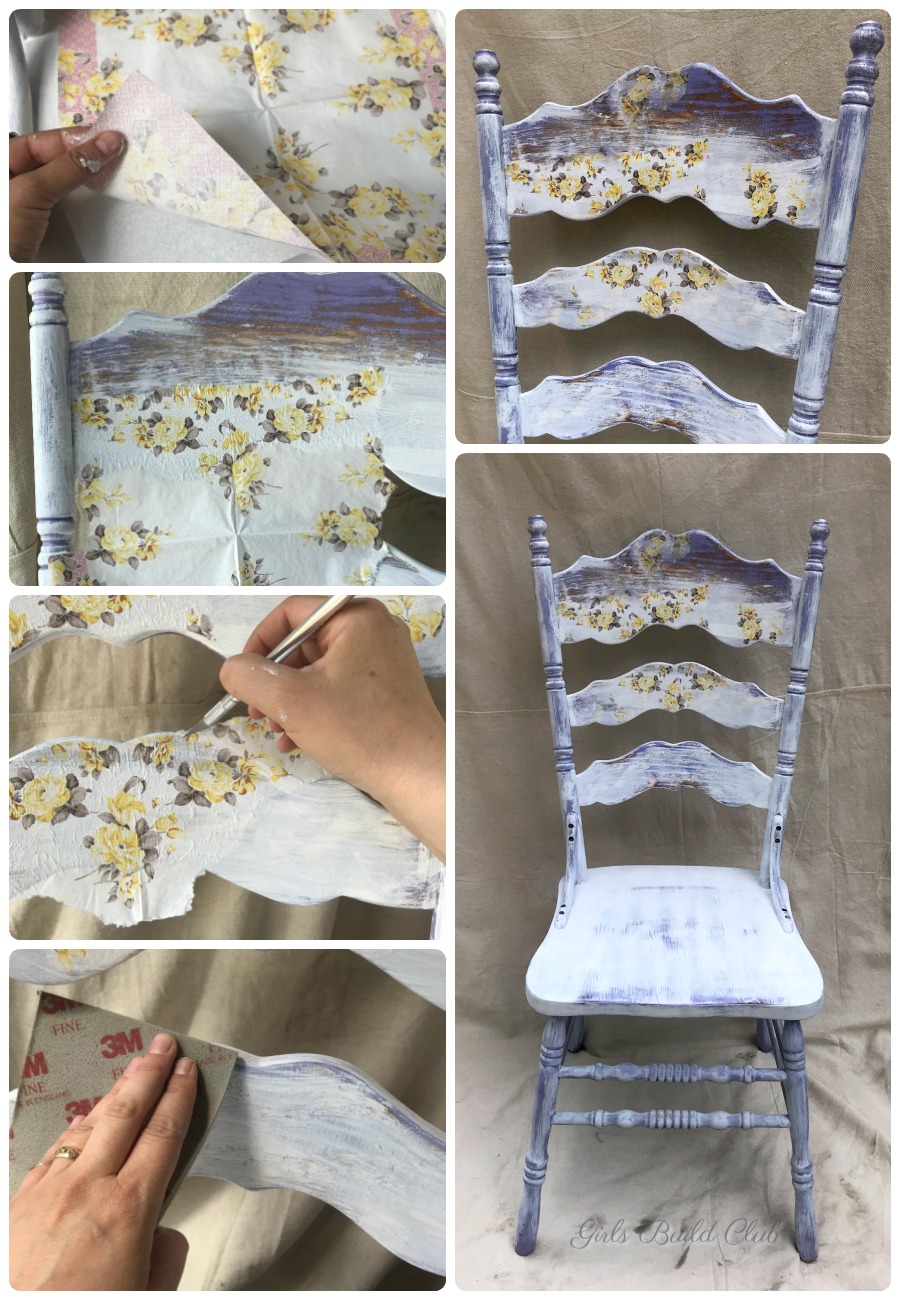
Leave a Reply