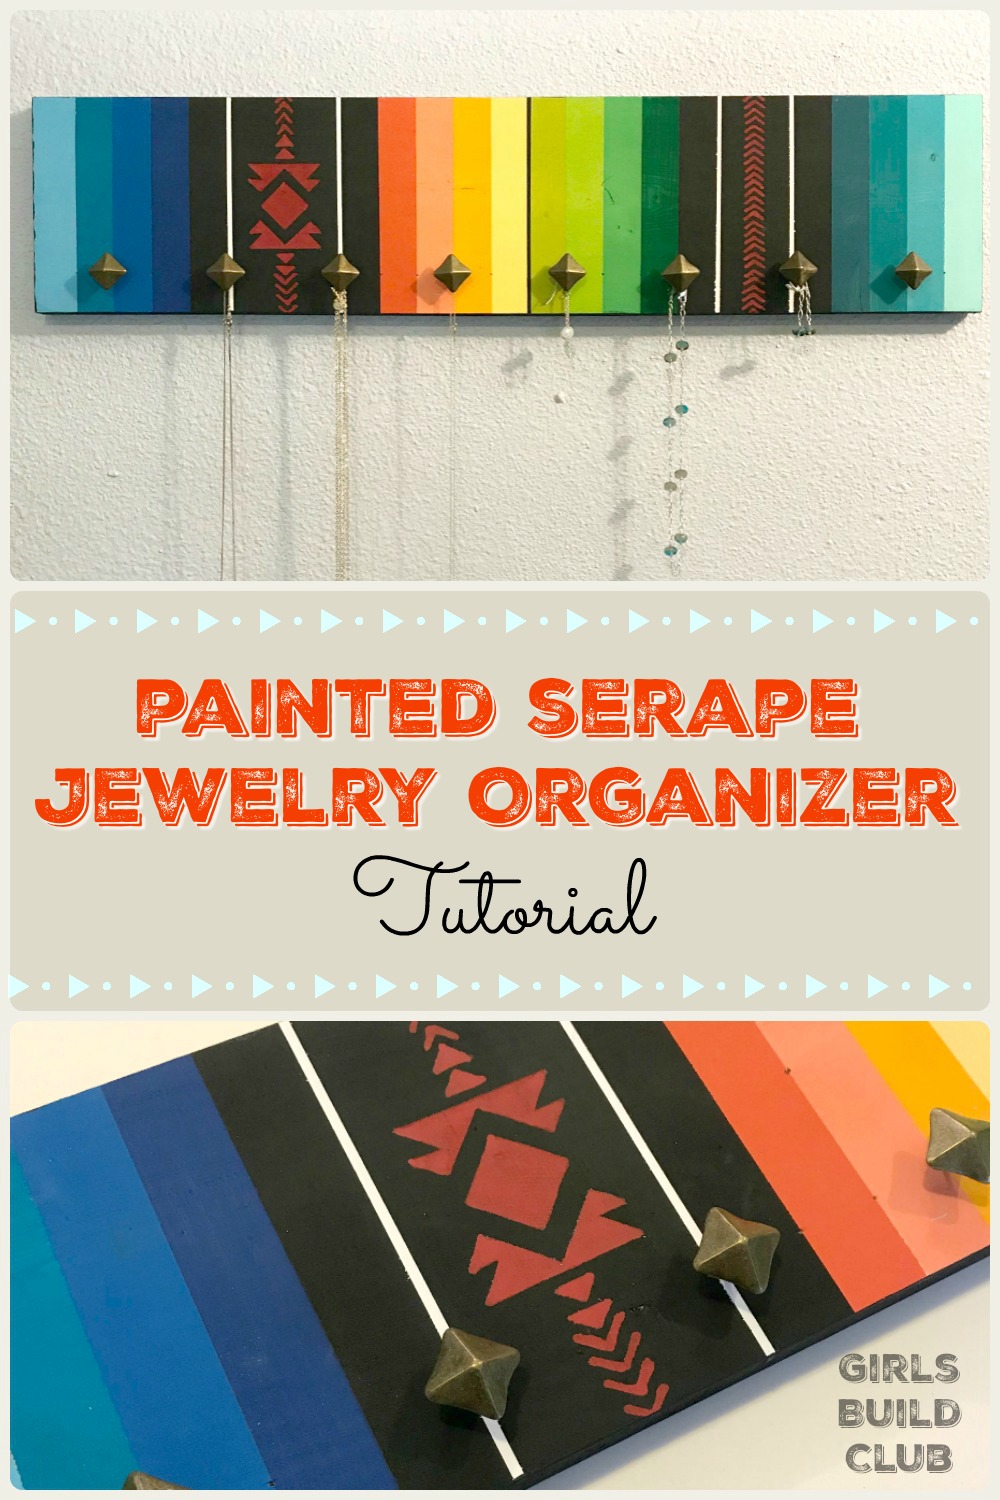
Painted Serape Jewelry Organizer Tutorial.
Time: 3 hours
Difficulty: Moderate
Cost: $36
Do you have little piles of jewelry all over the place – on your nightstand, on your bathroom counter, or on your dresser? Let’s get your jewelry sorted and easy to find with the Painted Serape Jewelry Organizer!
Right now I’m obsessed with any and all southwestern folk art, especially woven designs. There’s a huge variety out there, too, ranging from subdued muted neutral tones, to bright rainbow like color schemes. The bright ones especially make me happy.
I’ve been finding lots of beautiful Mexican woven goods on Etsy and Amazon, and seeing how people use the serape blankets to reupholster furniture. It’s so pretty and unique! And for some reason I always seem to pick out the most expensive pieces to fall in love with. Right around the time that I was deciding I would paint something like a Mexican blanket, I happened to find a beautiful serape blanket at goodwill for about $4!! It’s quite big and even feels like it could be wool. What I love about these Mexican serape blanket designs are the colors. So vibrant and bold! They just make you happy.
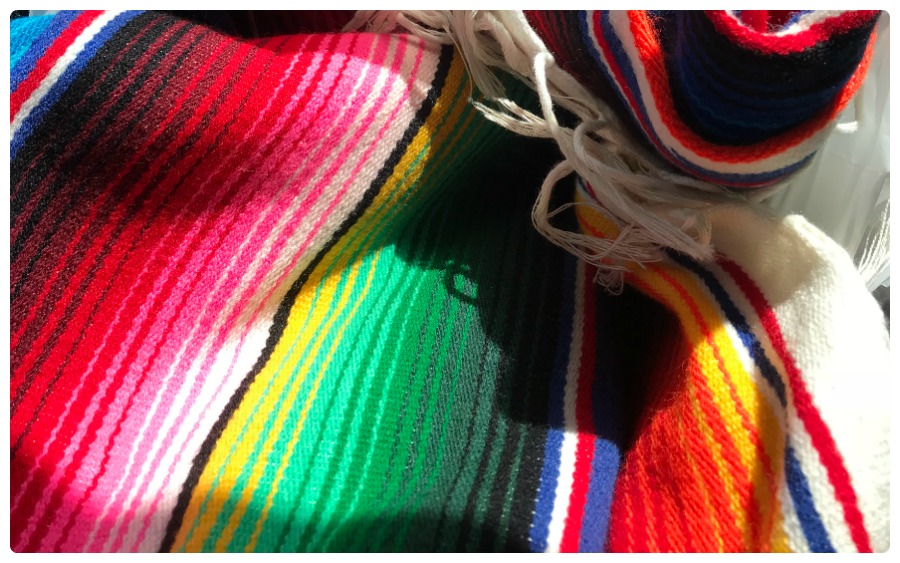
Anyhow, I’ve been studying it and others I admire on Amazon, and I finally figured out a “formula” so to speak for how to paint a serape-inspired design onto a wooden surface. It took a TON of painters tape, but it was relatively fast after I practiced it a couple times. So I suppose if you try this project it may take a day or so. But right now I can finish the painting portion in about 2 hours, excluding the time spent waiting for it dry.
I promise you, this southwestern design really is easier than it looks, because all you are doing is painting in between taped down lines. Then you stencil it later. So nothing is freehand. I will tell you what paint colors I used and the stencil I bought so there is no guesswork on your part.
However, I will admit, I still haven’t made one totally mistake-free yet! It’s easy to get the order of the colors mixed up when I’m taping and painting. So expect to make some mistakes, especially on your first jewelry organizer.
Here’s what you’ll need, and where I got it:
Supplies
Some of the following links are affiliate links. As always, I only refer you to the products I personally use and like. When you make a purchase through one of my affiliate links I may earn a small commission which helps to pay for this website.
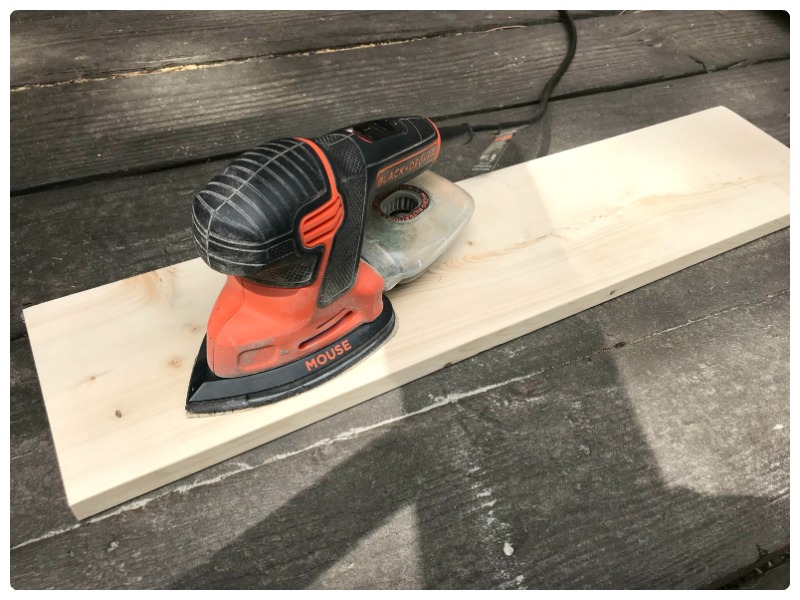
- 1×7 board cut 24″ long. This was scrap wood I dug out of the scrap bin at Foxworth-Galbraith and only paid $1. As an alternative, you could use pallet board. Or simply buy a new 1×7 from the lumber store.
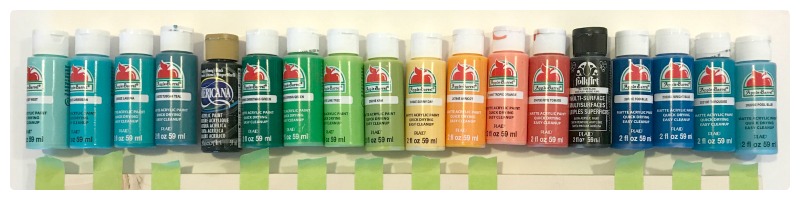
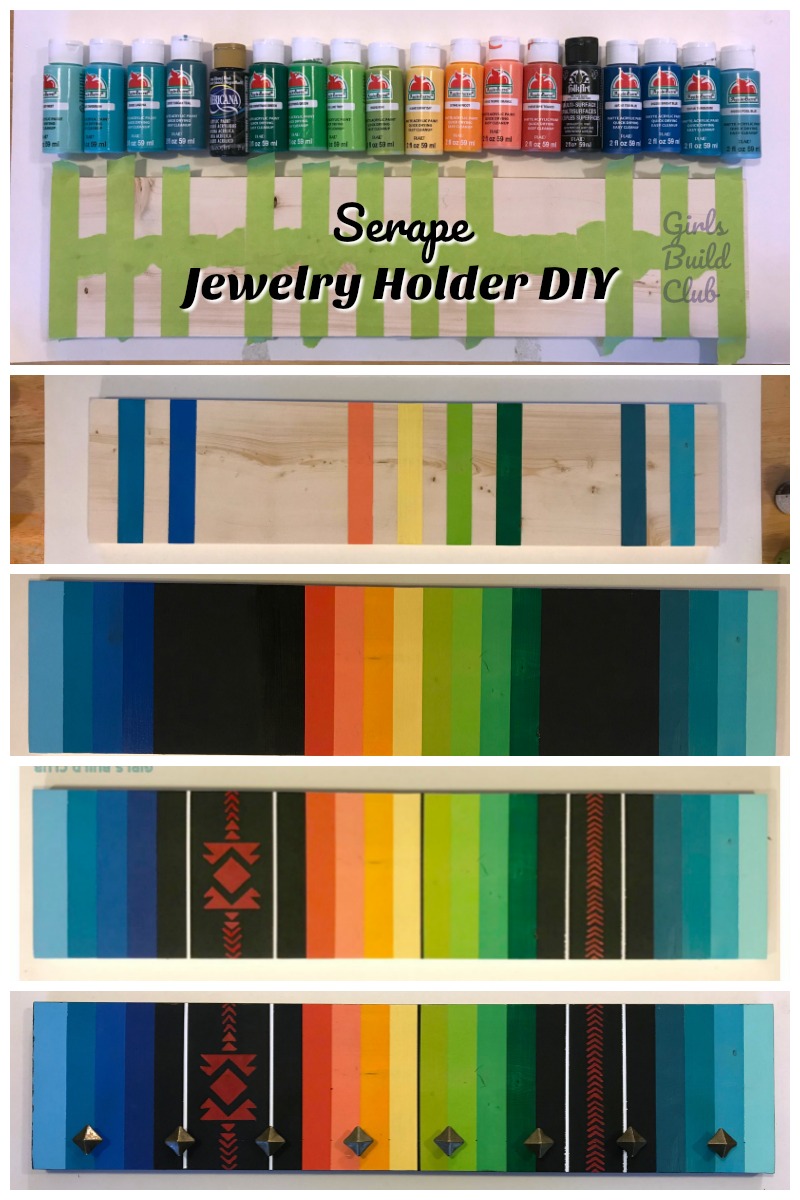
- Apple Barrel Matte Acrylic Paint, 2 oz. bottles ($0.50 each) from Walmart, in 18 colors:
- Black
- White
- Key West
- Caribbean
- Laguna
- Tuscan Teal
- Christmas Green
- Spring Green
- Lime Tree
- Kiwi
- Sunny Day
- Apricot
- Tropic Orange
- Ripe Tomato
- Too Blue
- Bright Blue
- Turquoise
- Pool Blue
- Elmer’s Painters Pen
in red – this is for the stencil design, $1.99 at Walmart
- White pencil, $0.99 in the sewing section of Hobby Lobby
- FolkArt stencil #59802 “Wild and Free” $9.99 at Michael’s
- Decorative Upholstery Nails
- Painter’s tape
- Foam Brushes
- (technically you only NEED one brush, but I like having 20 so I don’t have to wash them until I’m done painting for the day.
- Bowl or cup of water for your dirty brushes.
Really, you can find all of that at either Michael’s, Joann’s, or Hobby Lobby, minus the painters tape and scrap wood board.
Okay, let’s get started!
Instructions
- First you’re going to cut the board to the length you want. Then sand down the surface lightly with a grit between 100 and 200.
- Next, dust it off, and then use a damp cloth to remove any dust from sanding.
- Now I like to plan out my design with painter’s tape. I make each stripe the width of a piece of tape so you can use a piece of tape to space your stripes perfectly.

We’ll be painting the stripes in this order, as you can see below by the way the paint bottles are lined up:
2. We’ll start by painting every other stripe – anywhere there is bare wood.
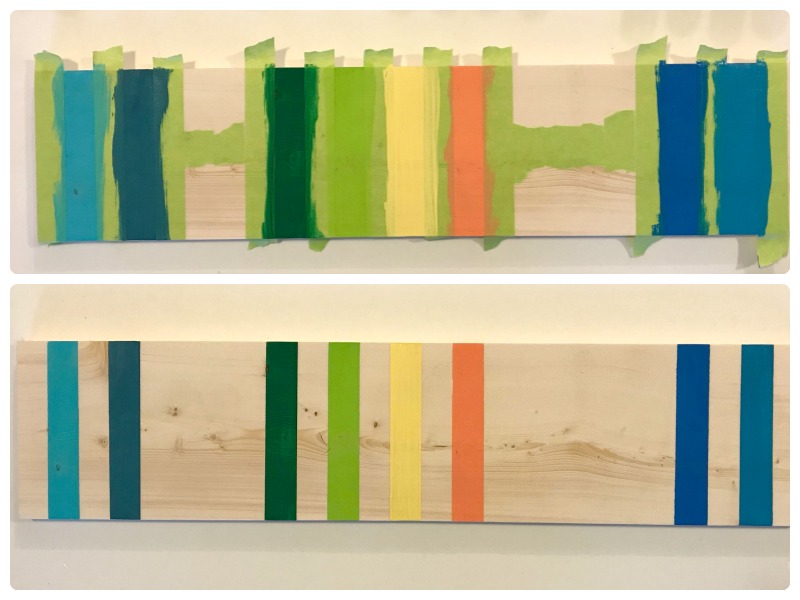
The picture above is what you should see after removing the tape from the first stripes. Wait for it to dry, maybe an hour.
3. Now place strips of tape perfectly covering the paint you just let dry. And you’ll have new bare stripes of wood to paint. Fill it in with the missing colors! Remove your tape before the paint dries.

Starting to look pretty!
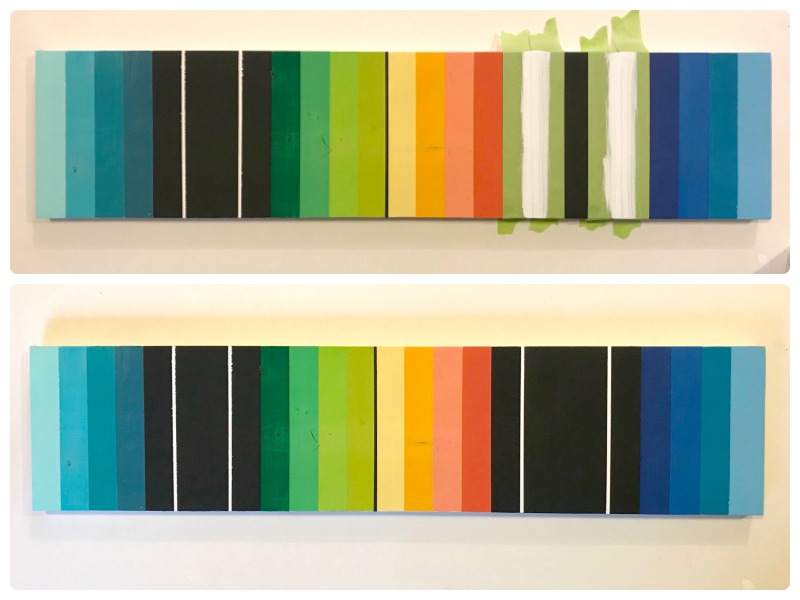
4. To add a little contrast and variety of line, we are going to add some tiny stripes – right in the middle of the green and red tones, and on the sides of the black sections:
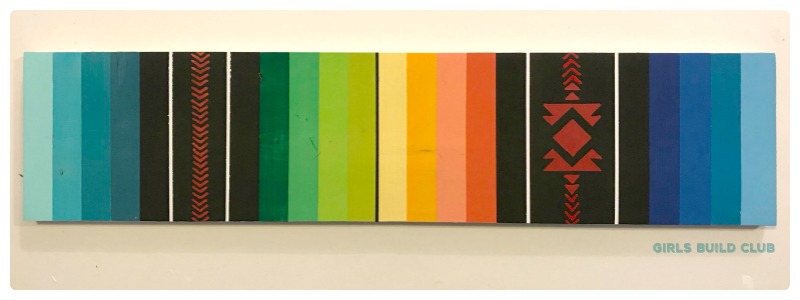
5. Finally, we are ready to stencil! For the stencil, I tape down the stencil when I think I’ve got the placement perfect.

6. Then I use a white pencil to outline the stencil design onto my board. Remove the stencil after penciling it on the board.
7. Now I take the red painters pen and fill in the white outline with red paint. I have trouble with stencils bleeding over the edges when I paint over them, so I’ve found that this method helps me minimize my mistakes!
Congrats! If you’ve made it this far, you are nearly done. The hard part is over.
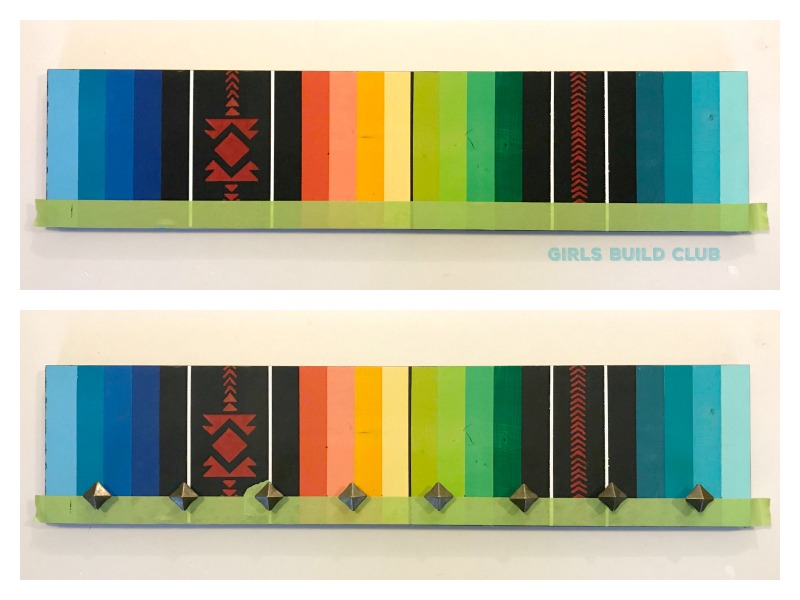
9. After applying the tape line as a guide, I pushed in the furniture nails starting at the edge of the 2nd stripe, and then every 3rd stripe I would push one in. Then I went back and tapped them in further with a hammer. But not too far! You’ll need them to stick out so jewelry can hang on them.
10. The last thing to do is hang it on the wall! The easiest way is by using 3M double sided foam tape that holds several pounds. Or if you’re afraid of it coming undone or falling on a pet or child, then just screw it into the wall studs and paint over the screws.
I think if you can muster up the will to try this project, you won’t regret it. It’s SO much easier than it looks. And you can customize the colors to suit your home. If you do make changes to the colors or design, I’d LOVE to see what you did. So post pictures! Send a message. Leave a note!
I hope you absolutely have a great time making this diy jewelry organizer. It will brighten up your space AND get some clutter off your bathroom counter or nightstand.
Can you help me out?
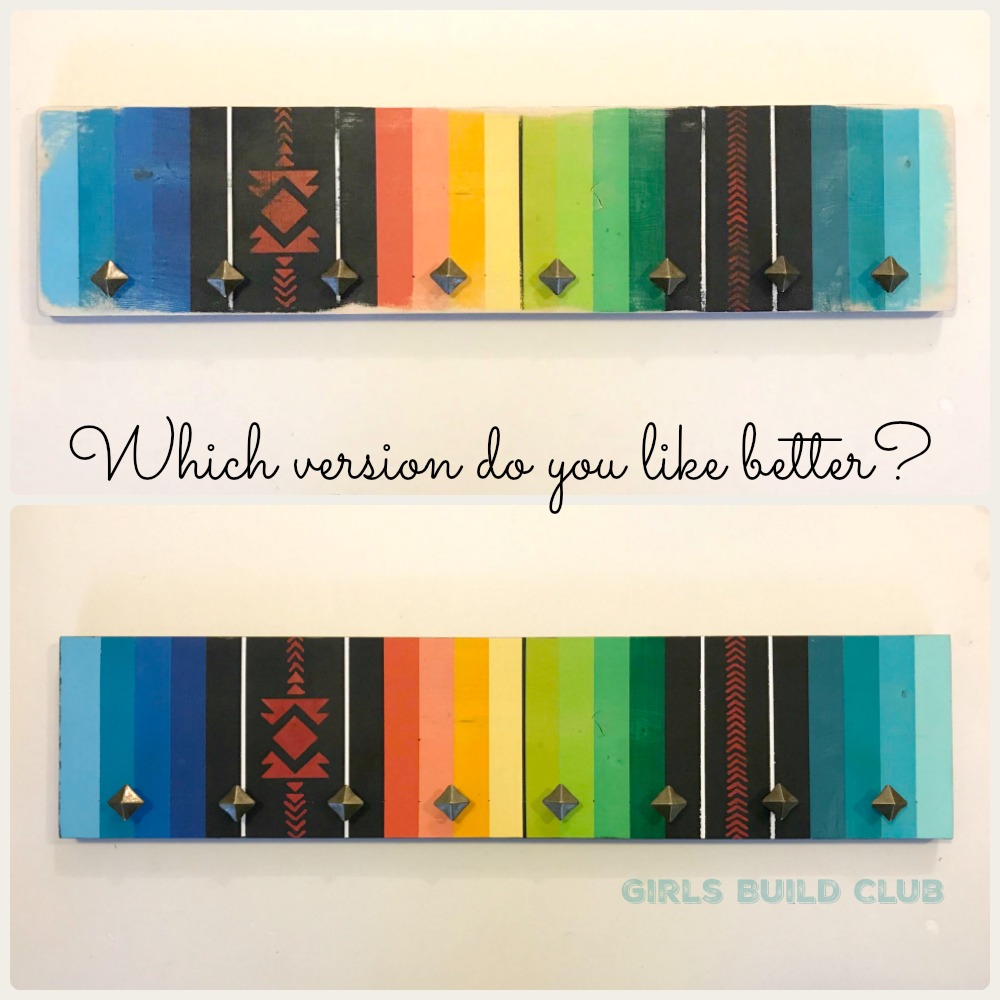
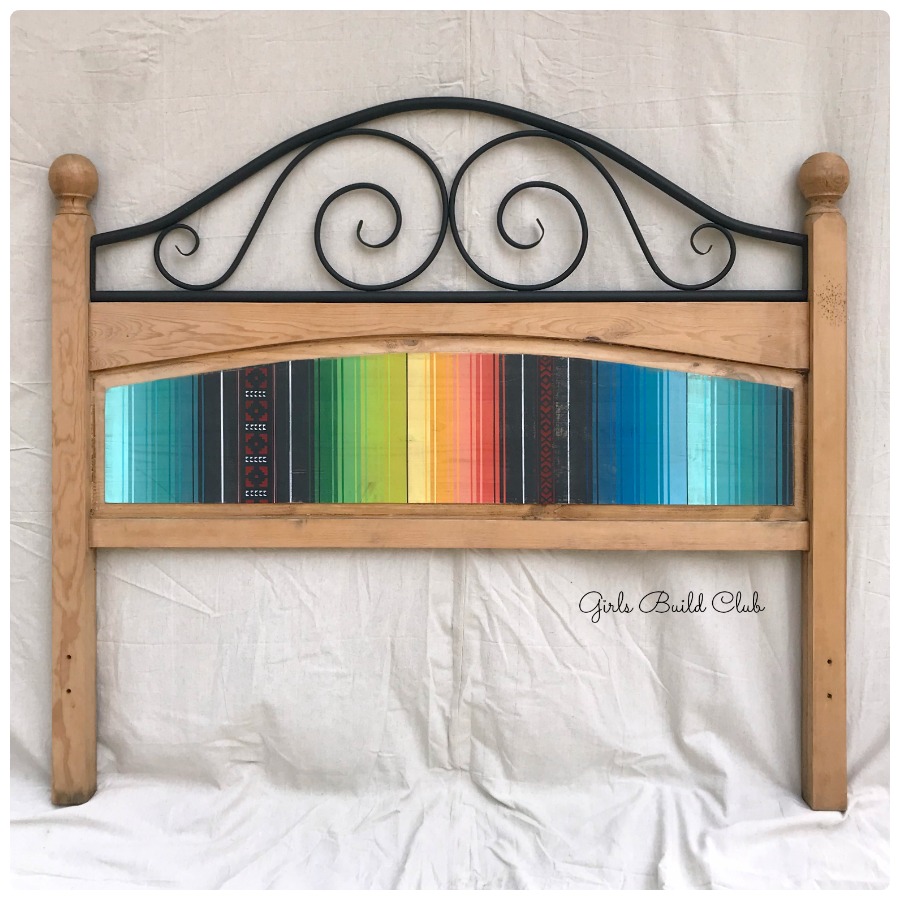
Do you like the colorful serape-inspired design? This jewelry organizer was a test run for a larger serape paint design I did on this Serape Headboard. It’s more complicated, so practice first on the jewelry organizer then set your sights on something BIG. 
And, hey, it’s okay if you just want something simple and sophisticated (and less colorful) to organize your jewelry. Check out the Simple Jewelry Organizer for an easier stained wood version.
Pin this project for later if you want to remember it.
Thank YOU!
Leave a Reply