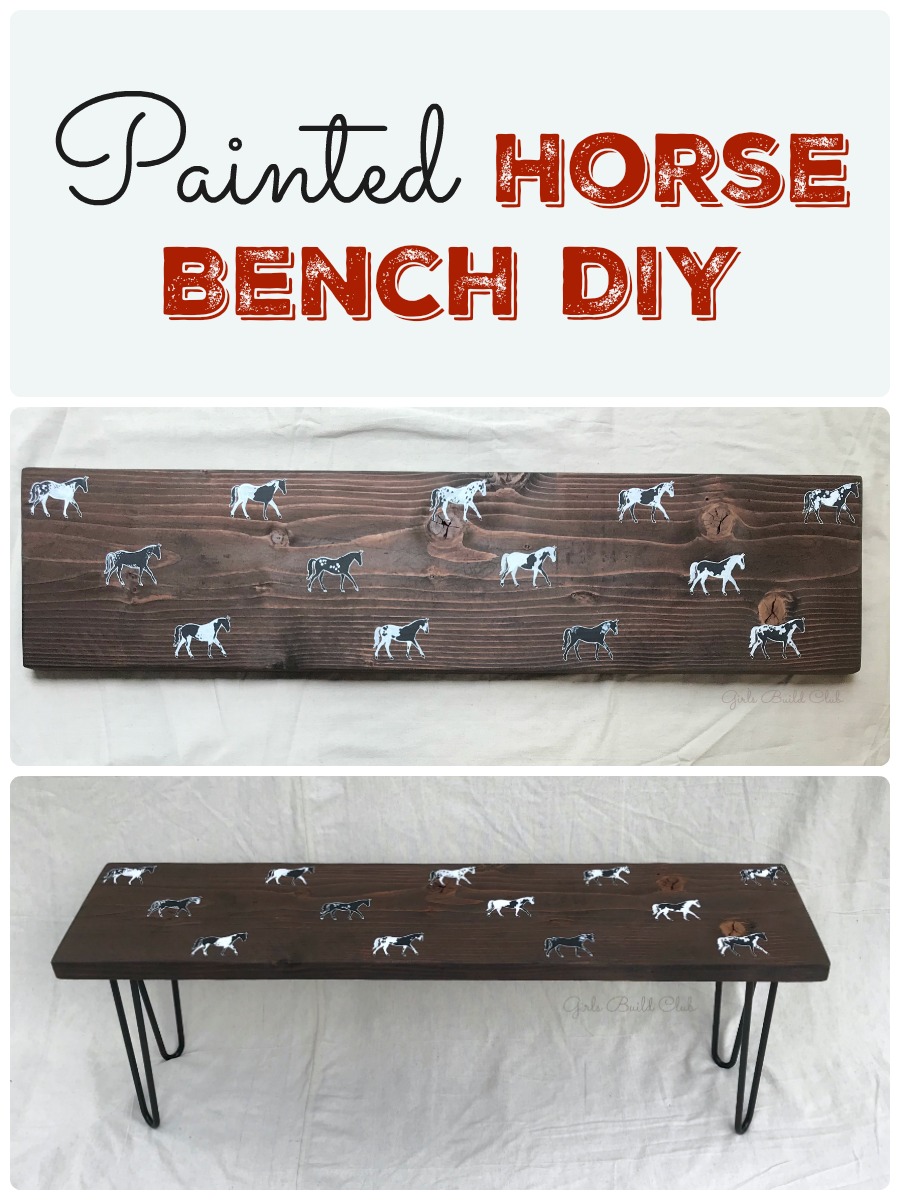
How to make and paint the Painted Horse Bench.
In this Painted Horse Bench DIY tutorial, I’ll show you how to prepare the wood, paint the horses, and attach the hairpin legs to your bench. It’s a super easy project and really catches the eye once it’s finished. If you don’t like horses, think about customizing it for yourself with your favorite animal…the options are endless! You could paint farm animals, birds, elephants, unicorns, cats or dogs, whatever you like. 🙂 Even if you love horses, you may prefer something more bold, like neon horses on a black bench. Use your imagination or find inspiration to get your creativity flowing.
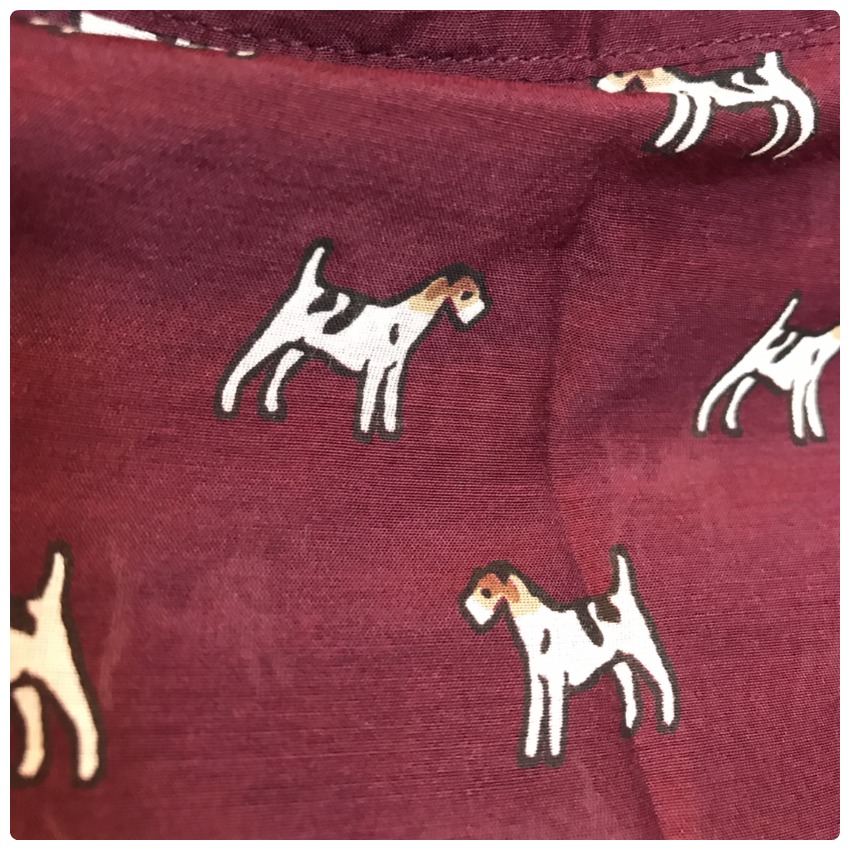
I found my inspiration for this bench design in a J.Crew shirt from Fall 2017. The moment I saw it I knew I had to paint a piece of furniture in a similar pattern. Can you see the resemblance?
Overview
Time: 4 hours
Difficulty: Easy
Cost: $45
Prep the Bench Wood
We’ll start by preparing the bench wood to be painted. We’re going to sand it, clean it, and stain it before we can start painting the horse pattern.
You’ll need a few supplies for prepping and staining.
Some links in this page are affiliate links. When you make a purchase through the link I may receive a small commission which helps pay for this blog. I appreciate every purchase you make!
- Scrap wood (Mine is a piece of 2×12, cut 48″ long)
- 100 grit sandpaper
- Damp rag or tack cloth
- Minwax stain in Honey color
- Chip brush or rag for staining
- Mineral spirits if you want to clean your brush and reuse it someday.
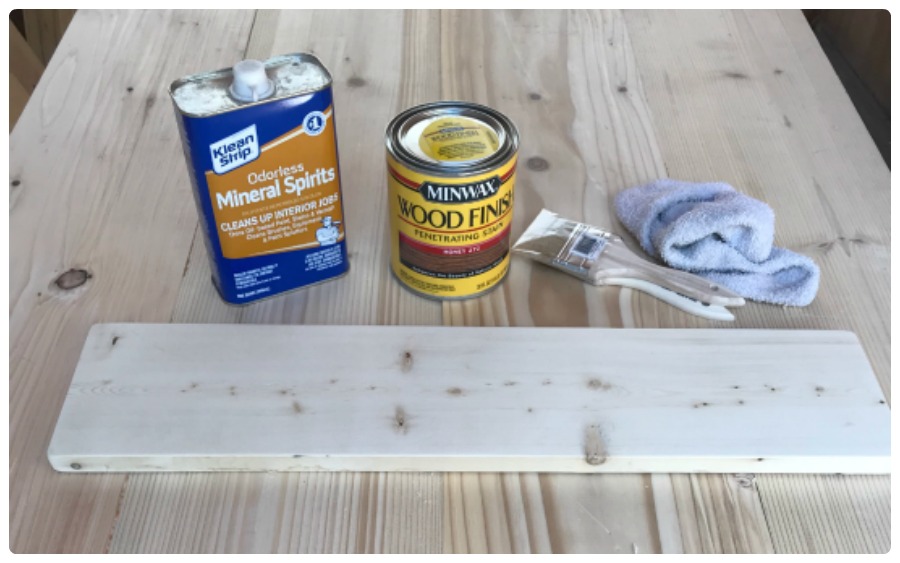
Supplies for staining the wood.
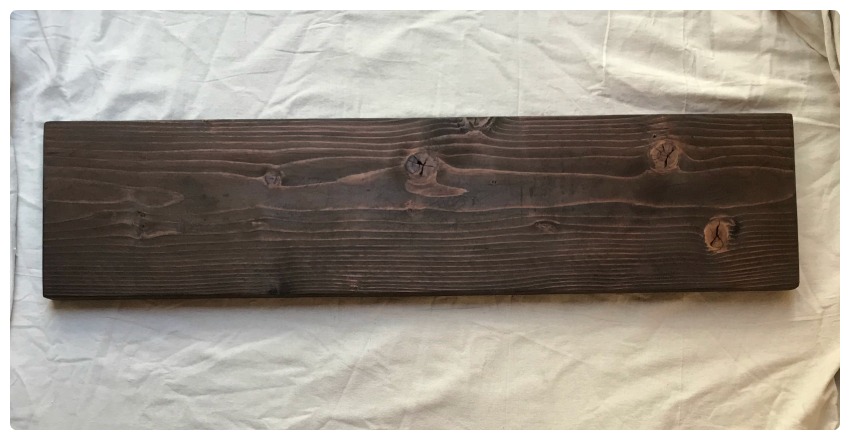
Let’s prep and stain!
- First we’ll sand the bench board to an even, smooth finish. I use about 100 grit sandpaper for this step. This removes splinters, and mill glaze. Mill glaze can keep the wood from absorbing the stain so try not to skip this step.
- Remove any dust with a damp rag or tack cloth.
- Apply stain, according to the manufacturer’s instructions.
- Wipe off excess and let dry! Time to dry will vary depending on your climate and the current temperatures. The day after staining it the board seemed slightly tacky. I let the board sit out for a few days before I started painti
ng the horses. Honestly, that was just because I was busy with other projects, but it seemed to do the trick and dry up more.
Okay now the board is stained and ready for painting!
There are many ways you can go about transferring the horse shape to your board. The method I used is one anyone can do. You don’t need fancy tools or a fancy Silhouette or Cricut cutter. All you need is the internet to find some fun and free clipart.
I did a google search for “horse silhouette” and found this website called ClipArtQueen.com with tons of horse images. Go to this page, scroll down, and you’ll eventually see the image I used. Thank you ClipArtQueen.com for providing this awesome clipart!
I used Microsoft Word to put a bunch of the horses on one page and then printed out a few pages.
Supplies for Painting the Horses
- Horse clipart printed and cut out
- Ball point pen
- White transfer paper
. AKA white carbon paper or white graphite paper.
- Elmer’s Painters Pens
- Acrylic craft paint in white and black
- Tape

How to Transfer the Horse Image
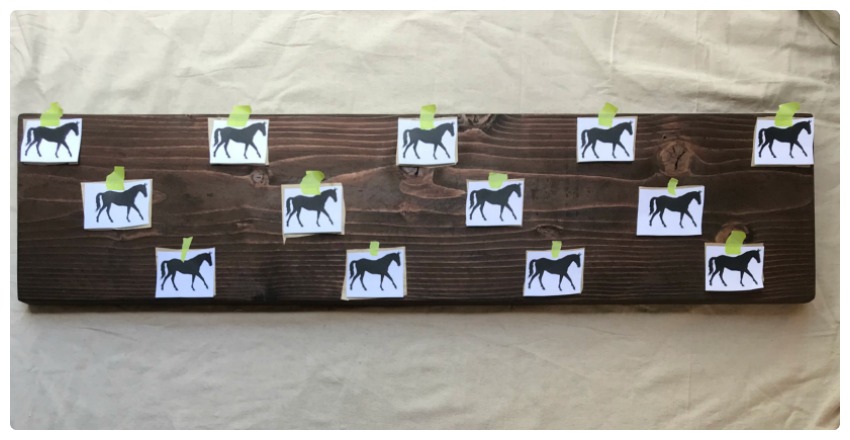
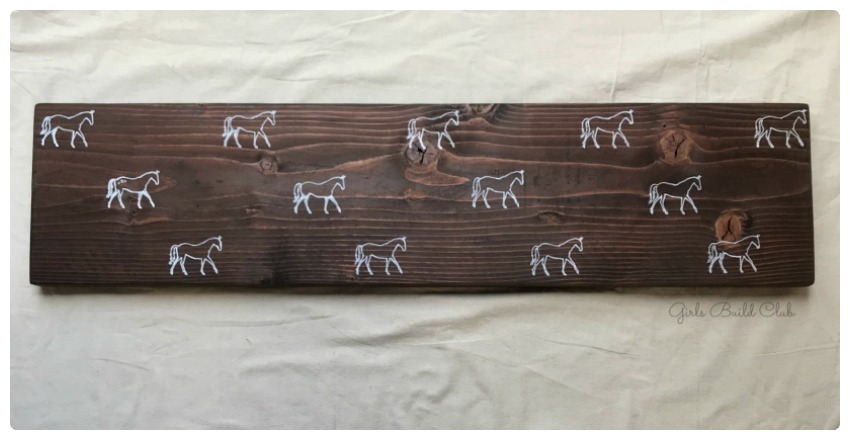
- First, loosely arrange your horses in the pattern you desire, so that you can count how many horses you really need.
- Gather the number of horses you need and cut out transfer paper to match it’s shape. Cut the transfer paper ever so slightly larger than the horse (so that when you tape it down, the tape will touch both pieces of paper and keep it more stable). Do this for each horse rectangle.
- Arrange the horses again with the transfer paper underneath the horses (white side down, touching the wood), but be very precise this time. Make sure you’re happy with the layout! For me, this took some playing around and rearranging for me to finally be happy with the layout.
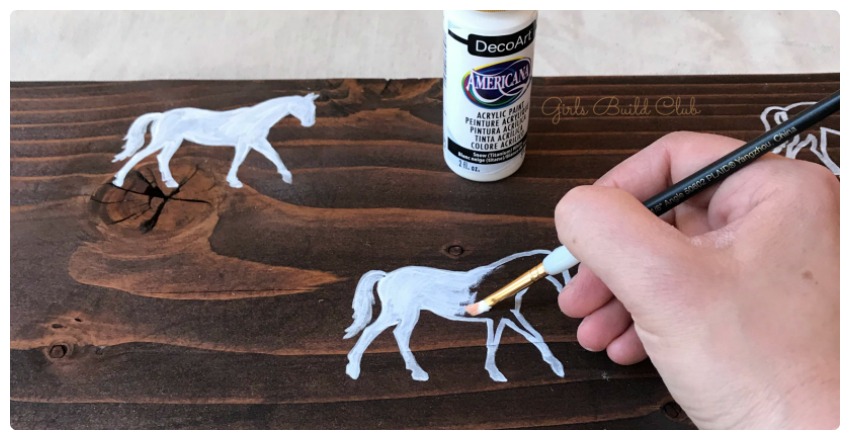
- Now trace the outline of the horse silhouette with a ball point pen. Trace firmly so the white transfers a strong outline to the wood. Trace the outline all at once, if possible, so you don’t end up moving the horse and getting superimposed outlines.
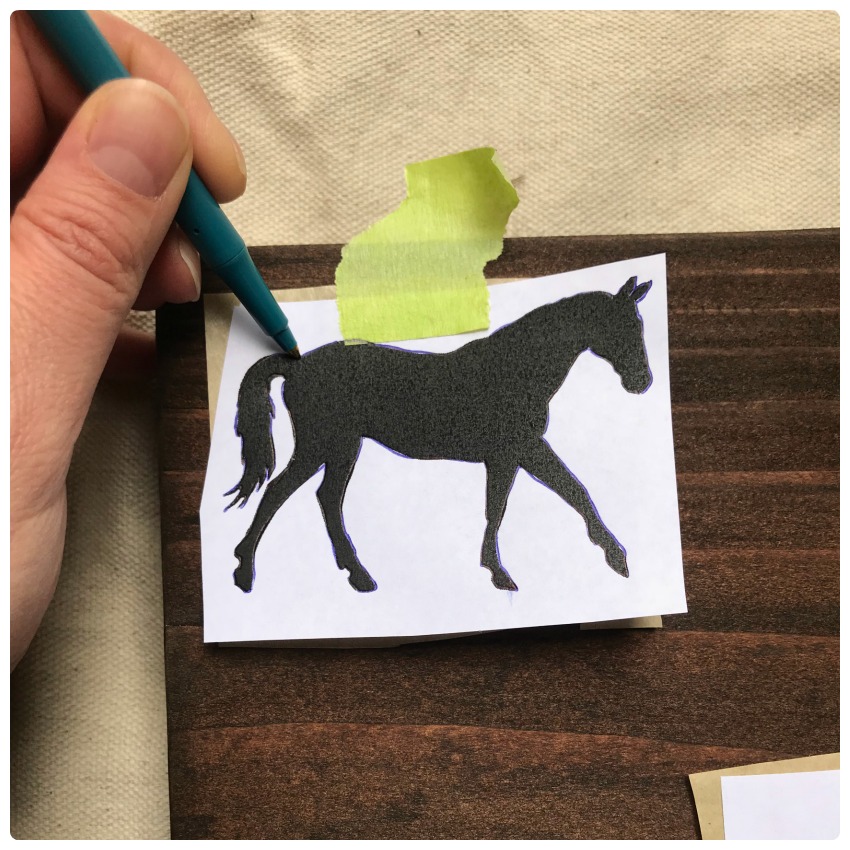
- Once you finished the outline, you can check your work. It will look something like this:
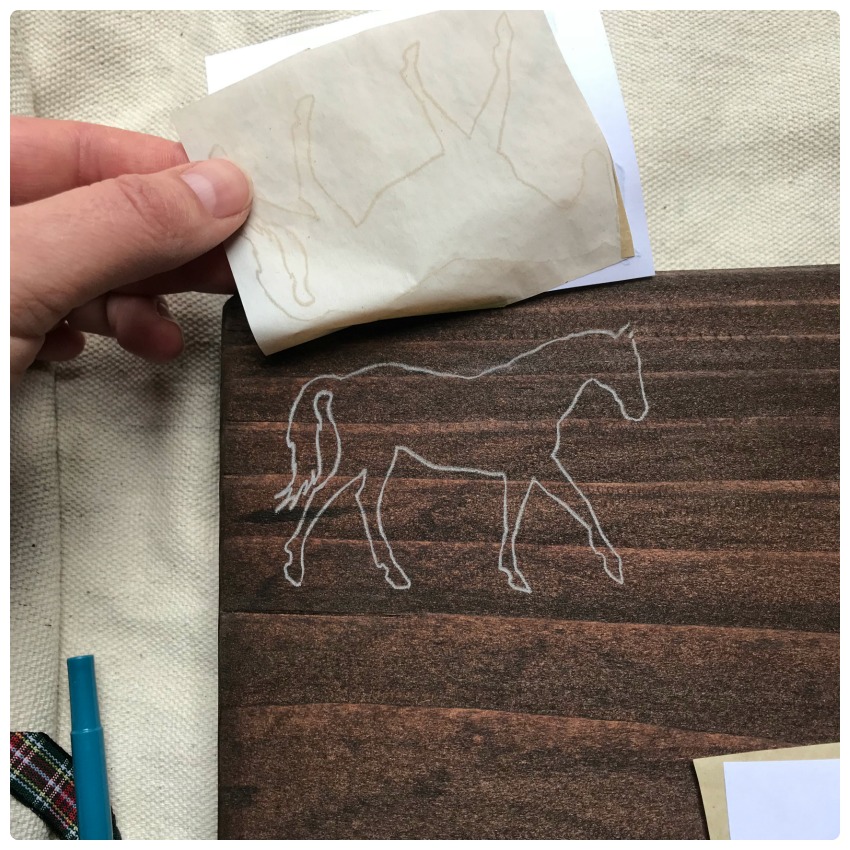 Continue tracing all the horses very carefully, and then remove the clipart papers from the wood.
I wanted a thick white outline to pop against the brown wood. So I went over the outline a second time with a white painter’s pen by Elmers. You can also see how I started to outline them in black, but I quickly abandoned that idea. 🙂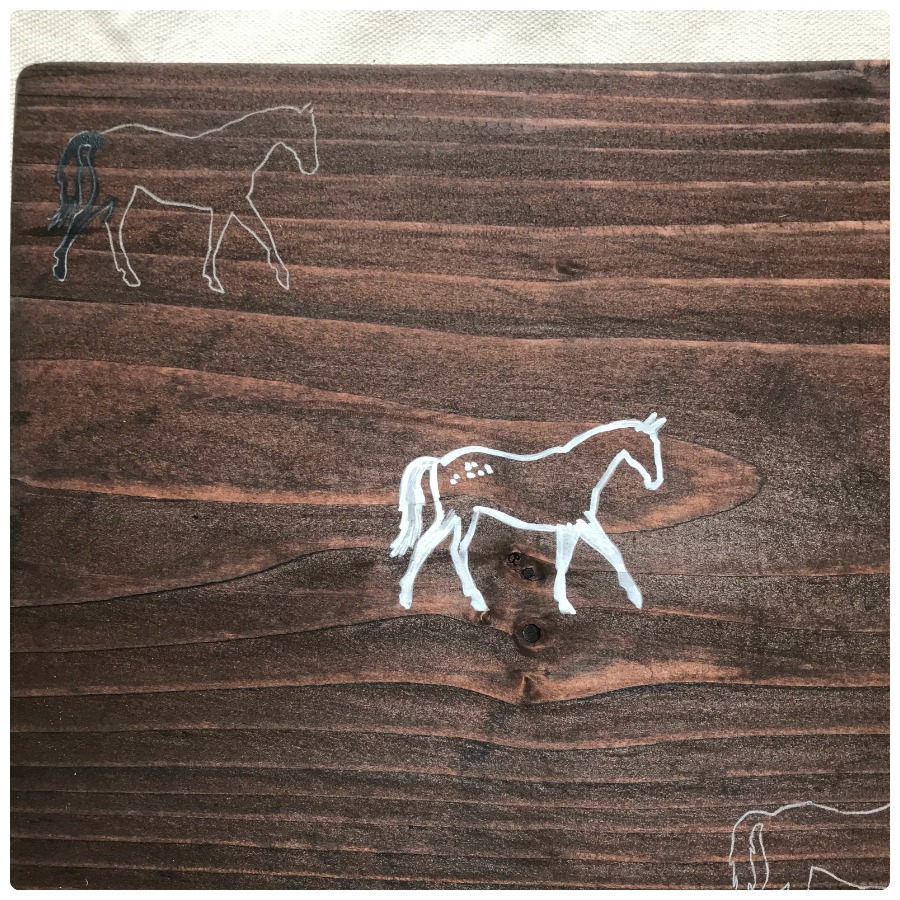 All the horses are now outlined with a bolder white line:
 How to Paint the Horses
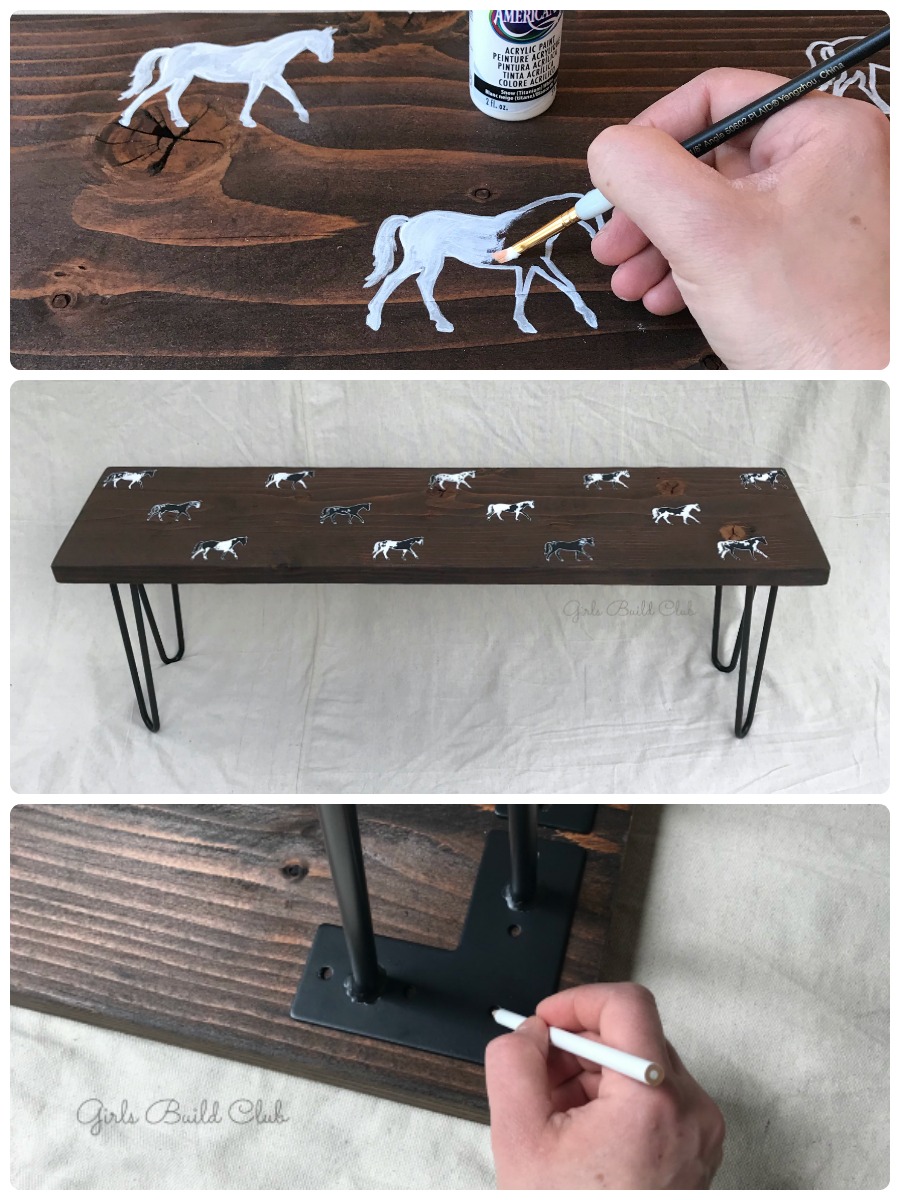
- Now we’re ready to paint! For every horse outline I filled it in with white craft paint. Even for the horses that I would end up painting black.
 Then I let it dry and applied a second coat of white paint to really get a solid opaque white base.
 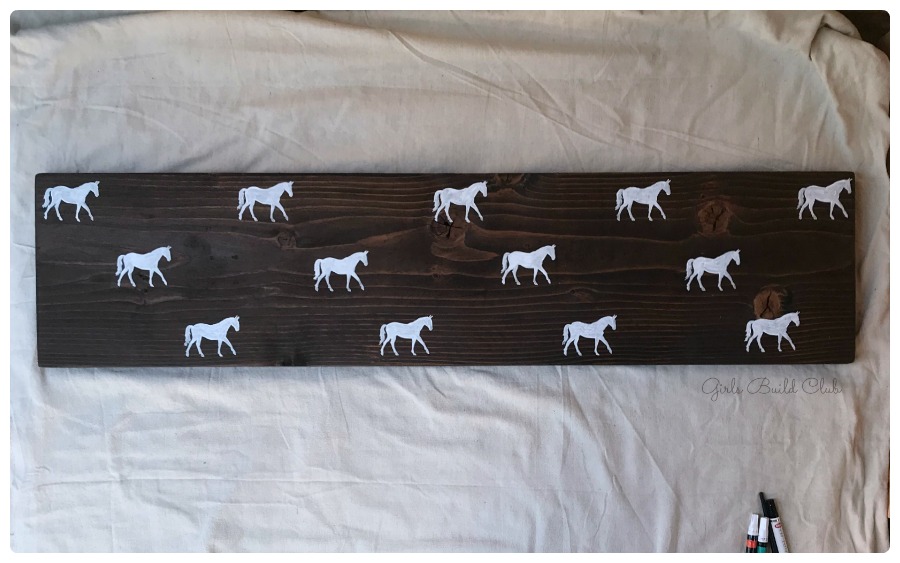 Honestly, I think the bench top looks good enough to stop here. If you’re not interested in doing multi-colored horses, these white horses would look awesome as they are! Or do a different solid color. You could definitely stop at this step and have an amazing bench. Or continue on…
 - At this point I needed to get out a horse encyclopedia and look at some pictures for inspiration on how to paint these guys. I started out sort of copying what I saw in the book, and then as I went along I gained confidence to just wing it and make up my own patterns.
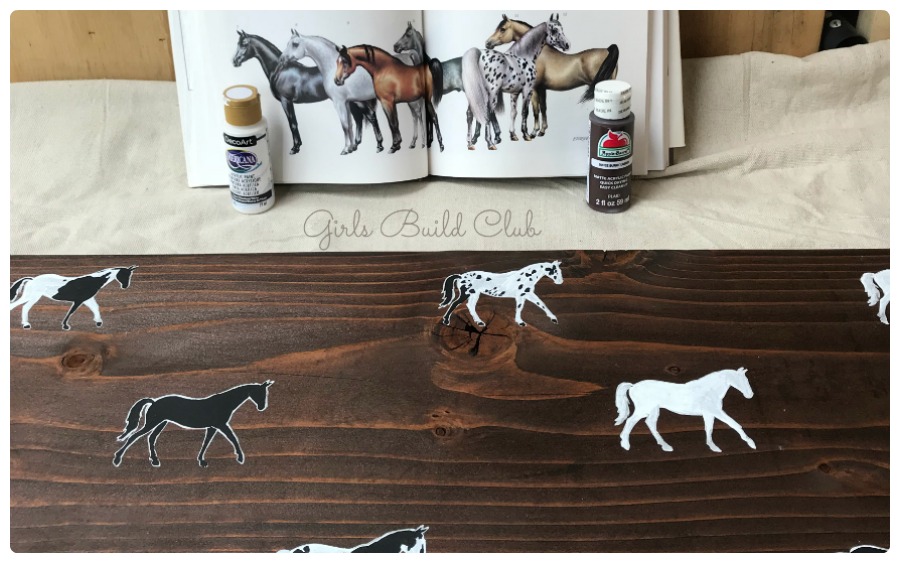 Out of 13 horses total, I painted 4 of them black and then added in white spots again. The other 9 had the white base paint and I added black paint for the spots. This ended up being my favorite step of all – painting all the spots and making each one unique.
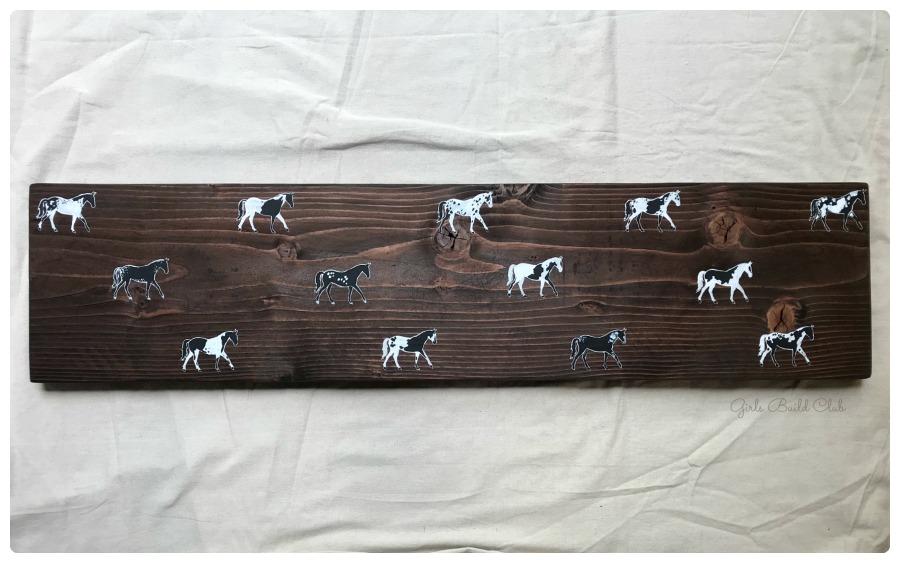
- Finally, it’s time to add a protective clear coat. I recommend either polyurethane for a durable coating or spar urethane for a more water-resistant coating.
Get some Hairpin Legs
I did a lot of research trying to find sturdy hairpin legs that were of good quality. First I bought some on Etsy. The ones I received were welded poorly and the base plate that attaches to the bench wood wasn’t perfectly flat because of the welding. The seller was really late in shipping them. He didn’t communicate with me that he was having issues, he just marked them as shipped, and then didn’t ship them for another couple weeks. That was disappointing because I really wanted to support a small business. I could probably find a more reliable maker on etsy but I had wasted a lot of time waiting for those and now I just wanted to get on with my project.
So then I turned to amazon, and I found these PERFECT hairpin legs <– my affiliate link. They are sturdy, and uniformly made, and the base plate lies flat against the wood. Oh and they are CHEAP. 🙂 I got mine for about $38 for a set of 4 legs, but as I write this, they are on sale for $27. That’s a good deal!

They are called Harry’s Hairpin Legs. I got a set of 4 legs, 16 inches long, 1/2 inch thick steel, in black satin. I love them and I’ll be using more of them in future projects.
Attach the Hairpin Legs!
You’re almost done, my friend! Attach the legs and you’ll have a bench you painted and made yourself.
Since my board was 1.5 inches thick I used 1.25 inch exterior screws to attach the hairpin legs.
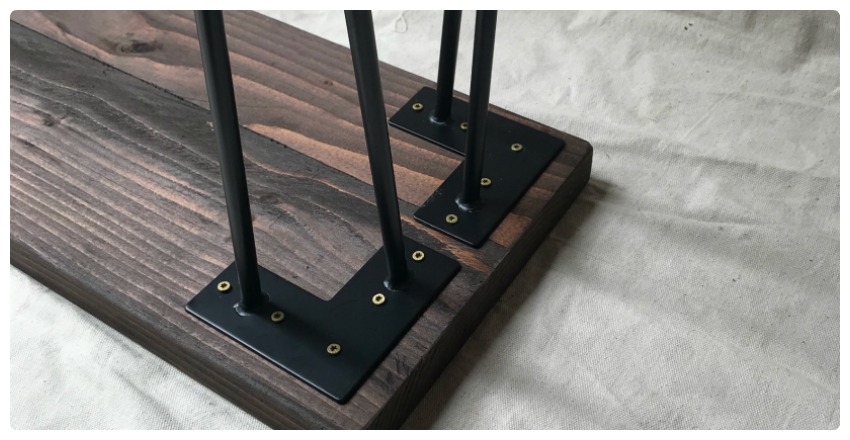 I followed the instructions that came with Harry’s Hairpin Legs to attach them.
The gold screw heads won’t show underneath the bench, but if it bothers you, then you can dab some black paint on there to hide them better.
She’s all done! What do you think?
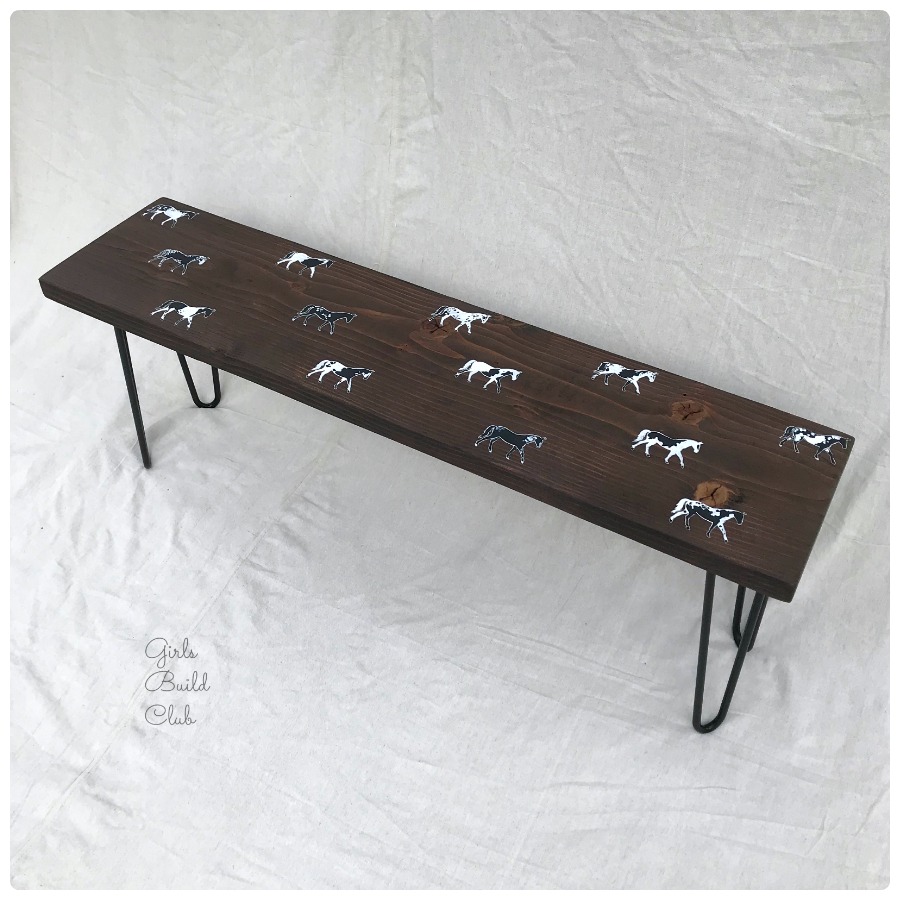
I’m really pleased with this bench! It’s a stunner without being too over-the-top bold. I love painted furniture and how easily you can turn something boring into something one-of-a-king and extraordinary. How will you customize this design for your own personal style and home decor?
You could do a lot of things to change up this horse design to reflect YOU. Change the animal. Choose different paint colors. Use a different piece of furniture. I’d love to see pictures of what you come up with!
If you want to try this project soon, don’t forget to pin it now to revisit later!
New projects hit the blog every week or so, so sign up for the newsletter so you don’t miss out!
I love the horse bench! Thanks for posting. I found it on Hometalk.
Thank you so much, Bob! I hope you try the project. And, if you do, I’d love to see photos of your version!
Thanks for stopping by.
~ Liesell