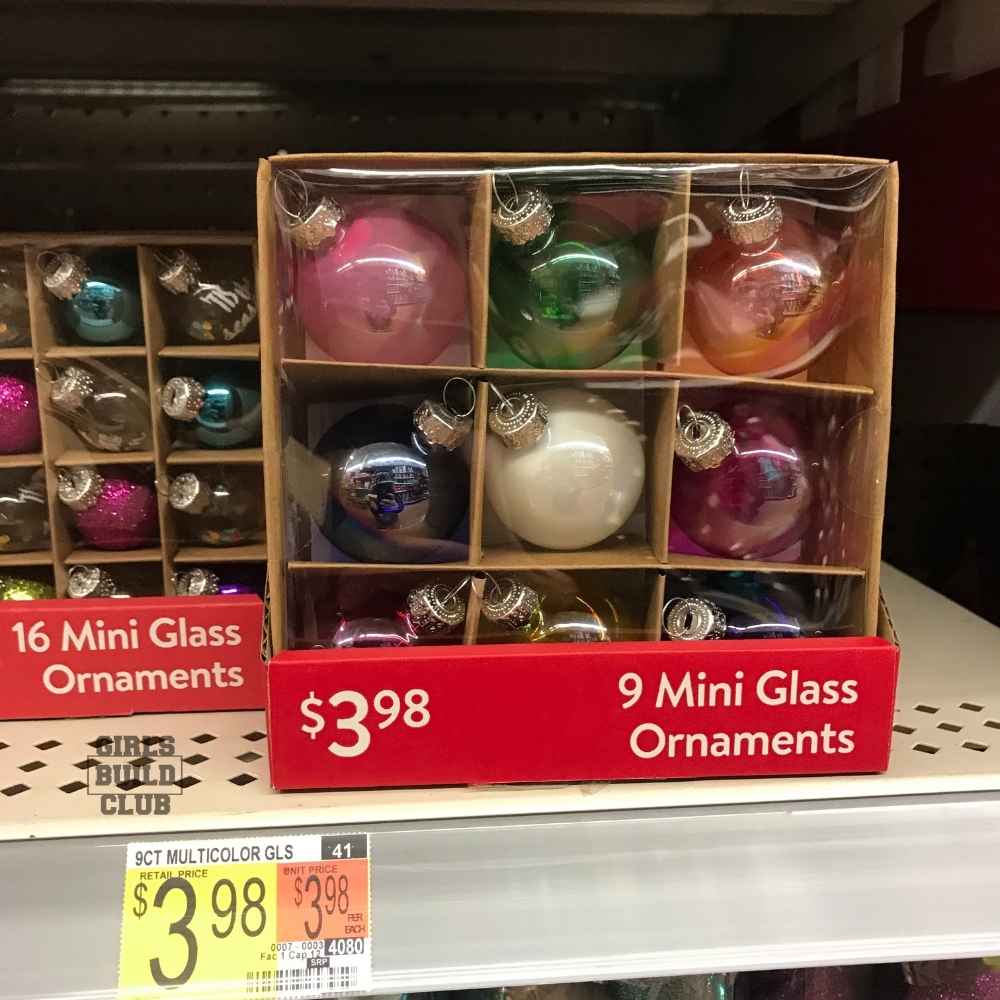
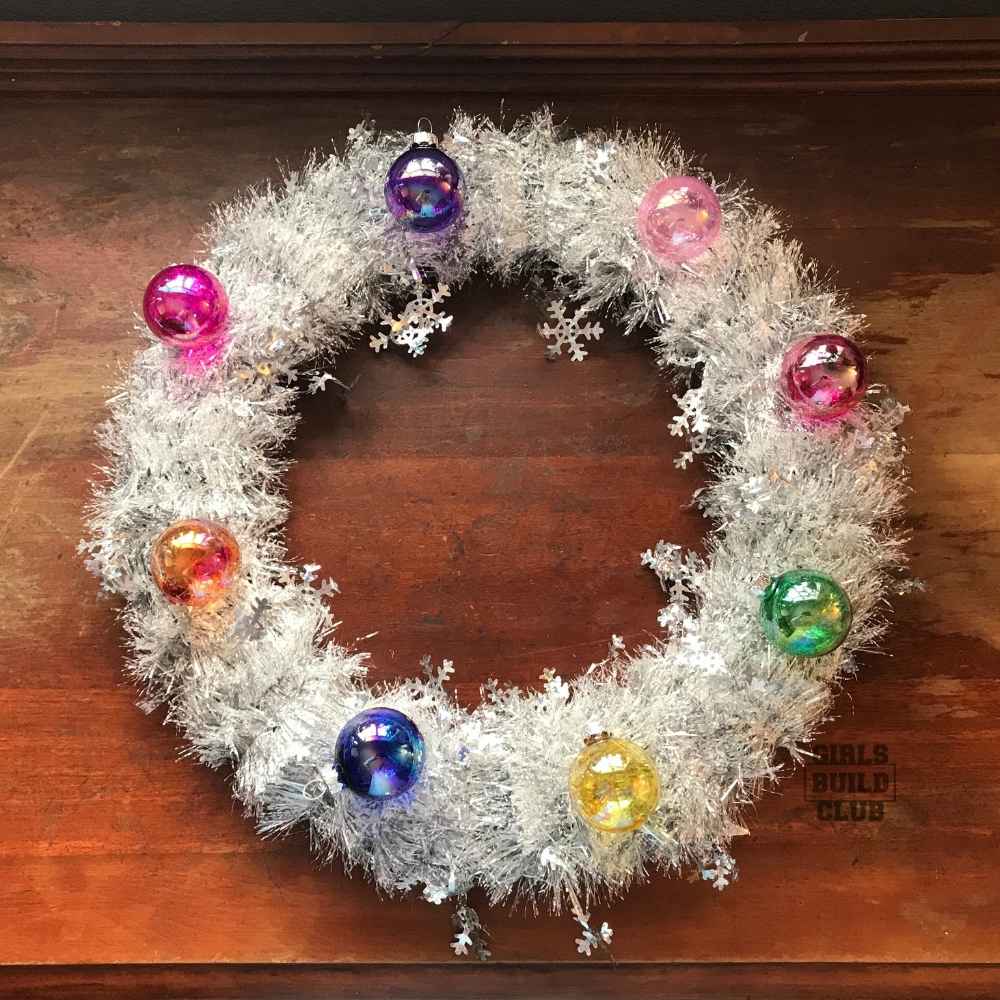
Learn how I made this super simple DIY Vintage Christmas Wreath for $10 or less. You can buy all your Christmas wreath supplies at the Dollar Store…but I did get ONE thing at Walmart – the vintage style Xmas ornaments – and it was so worth it.

I love the aesthetic of vintage Christmas decorations! The colors are amazing, and a nice change from the primary colors of the Christmas decor I grew up with.
Overview
Difficulty: Easy!
Time: 15 – 30 minutes.
Cost: $7 to $10 depending on the ornaments you select
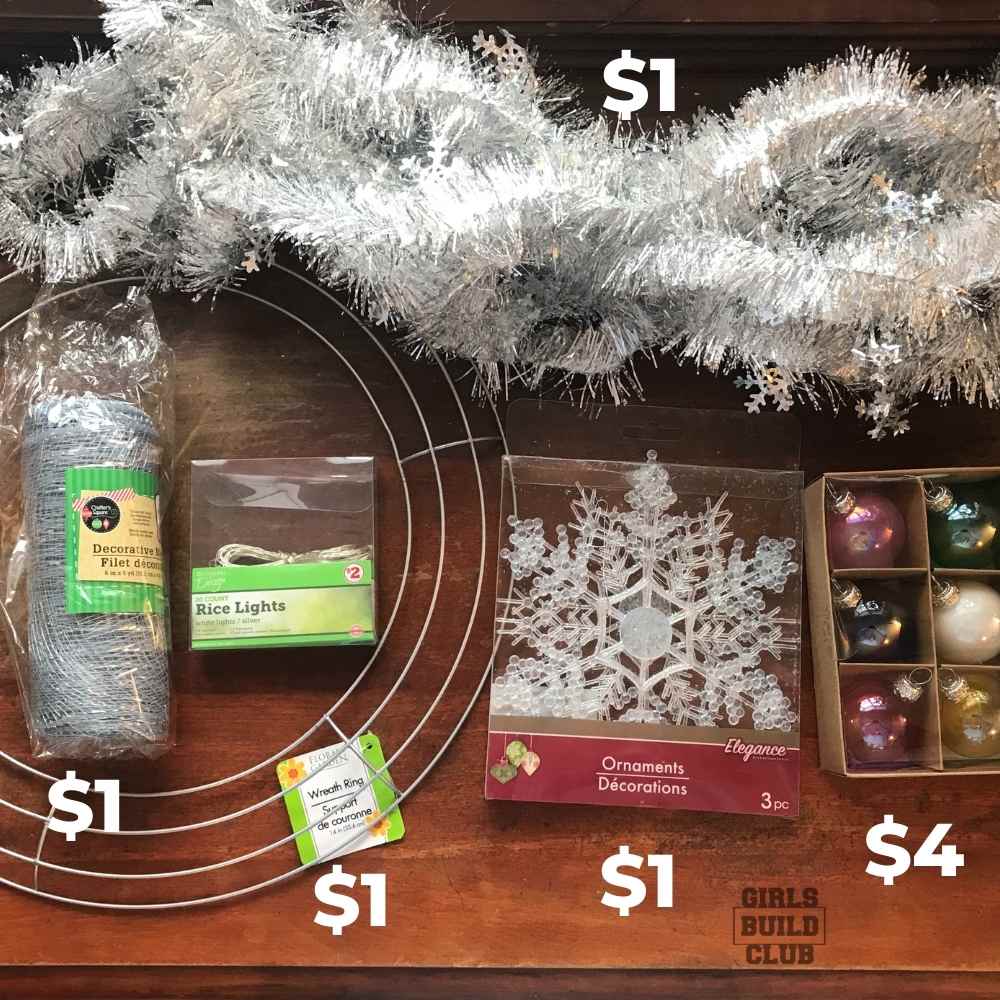
Christmas Wreath Supplies
- Wire Wreath Form – $1 at Dollar Tree
- Silver Mesh – $1 at Dollar Tree
- Silver Tinsel Garland x 3 – $1 each at Dollar Tree
- Snowflake Ornaments – $1 at Dollar Tree
- Vintage Style Ornaments – $4 at Walmart
- Hot glue, or floral wire – I already had both, but you can get wire for $1 at Dollar Tree
- Optional: Mini string lights! Lots of options for $1 at Dollar Tree.
You could definitely cut a couple dollars by going with a pack of ball ornaments from the Dollar Tree, too!
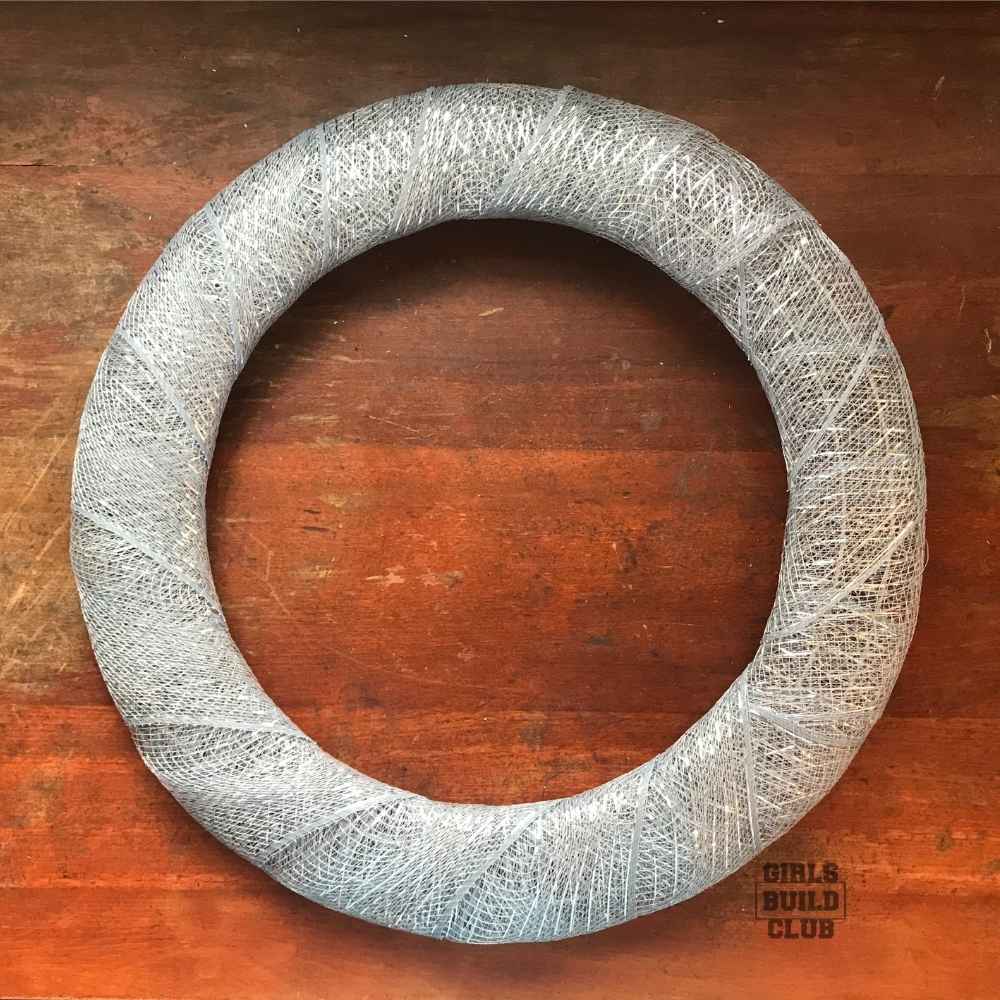
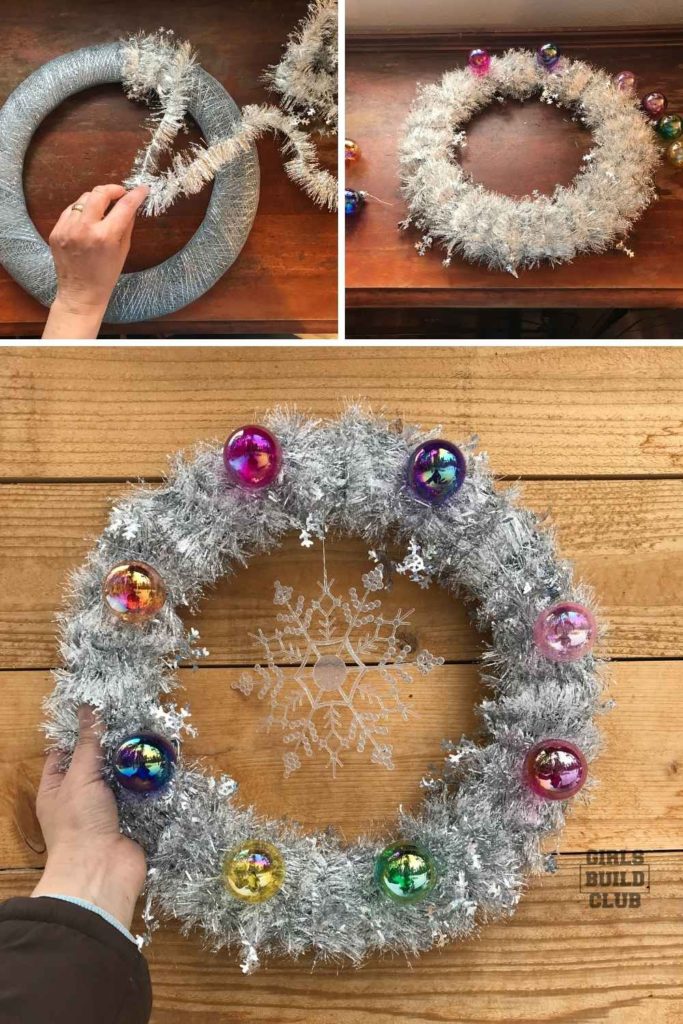
1. Wrap the Wire Wreath Form in Mesh
I did this step to hide the wire form a little better. I didn’t want any gaps in the tinsel to reveal the wire behind it. But, I think if you use enough silver tinsel, then you could probably get away without doing this step. Up to you! I like how it looks, though, with the wire mesh base.
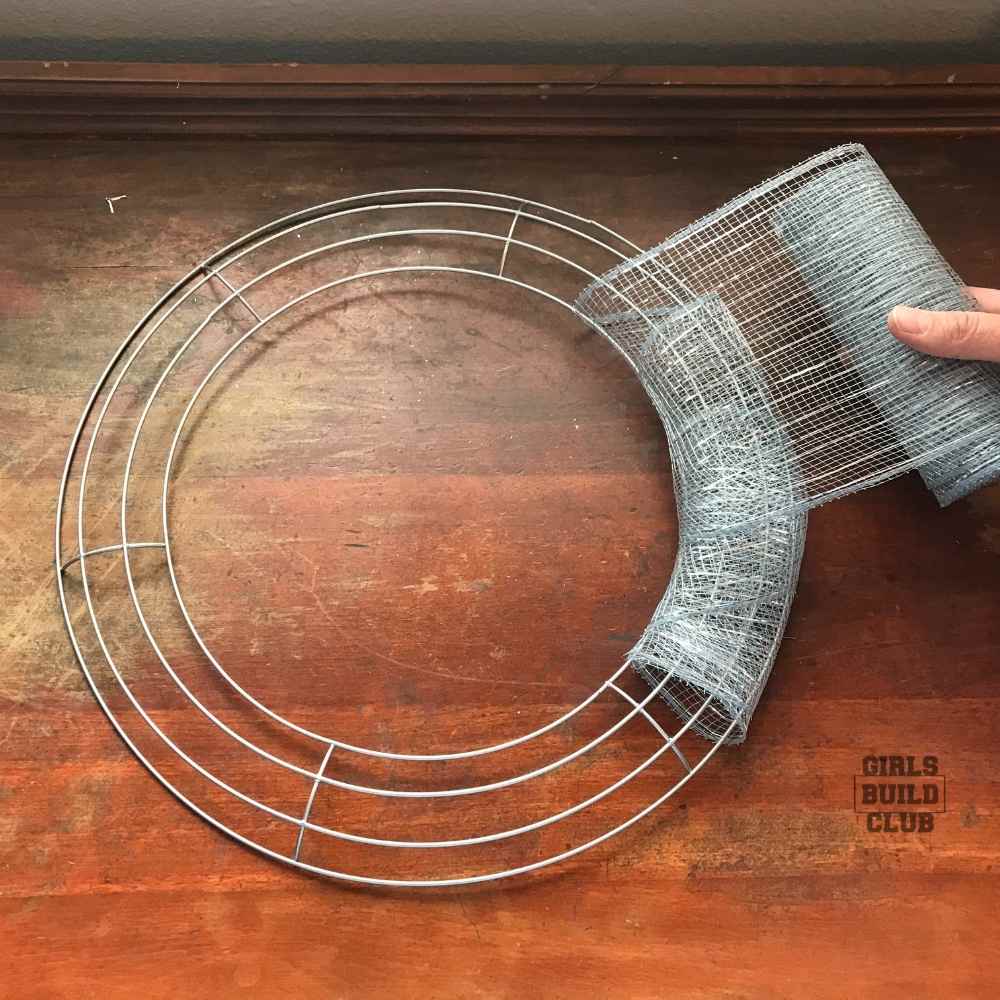
I think I secured the start with a piece of floral wire, connecting it to the frame. But seriously, use anything, even duct tape! It’s getting hidden, and it will stay secure once it’s wrapped up several times.
At the end of wrapping it I used some hot glue to secure it. Be careful, though! My mesh melted a bit. I recommend securing the mesh on the back of the wreath to hide any mistakes.
2. Wrap the Wreath in Silver Tinsel.
Now wrap the wreath base with your silver tinsel garland! It took me 3 garlands to completely cover the Christmas wreath base.
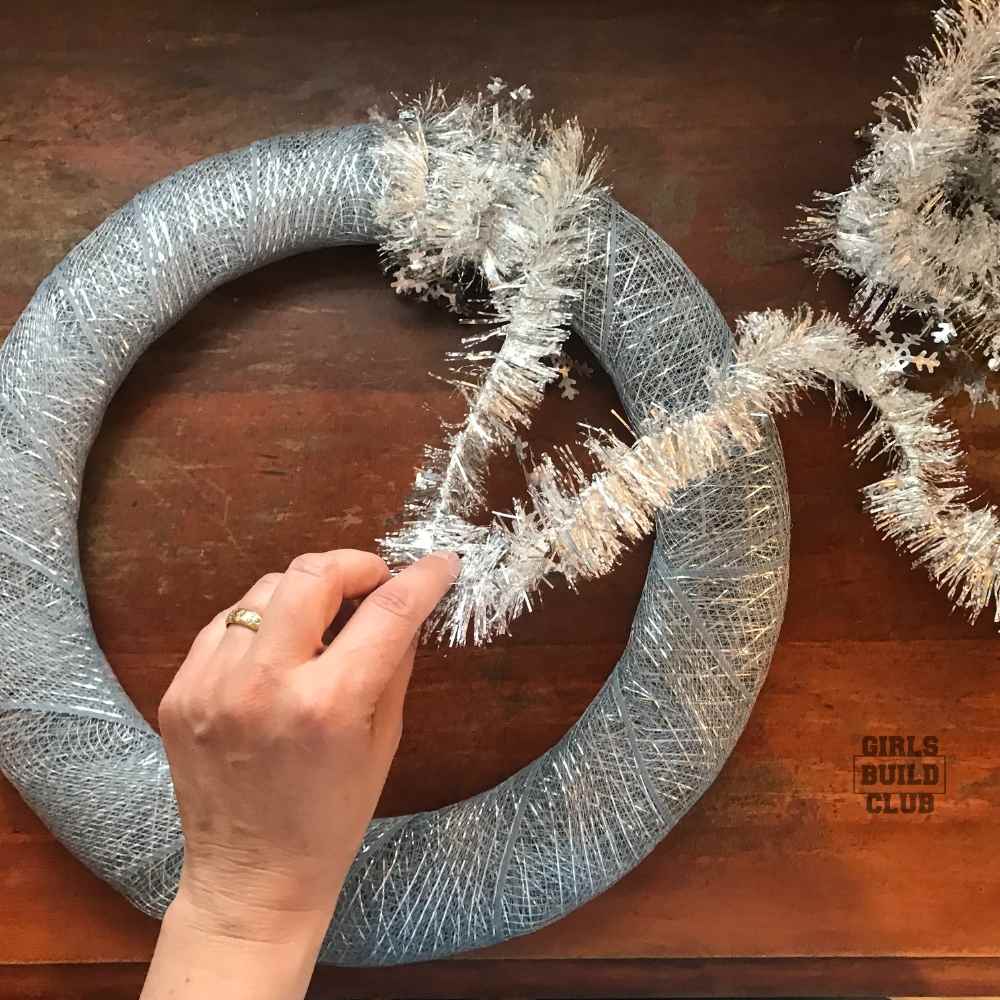
It takes a minute to get the whole thing covered. But once it is, the fun begins. It’s starting to come to life!

You don’t really need hot glue, but I added a couple drops here and there as I wrapped the tinsel around the wreath form. Really, you only need something when you come to the end of the tinsel garland for securing the loose end.
3. Secure the Ornaments to Your DIY Vintage Christmas Wreath
I started by adding some bits of wire to the ornaments, which I could then use to attach them to the wreath.
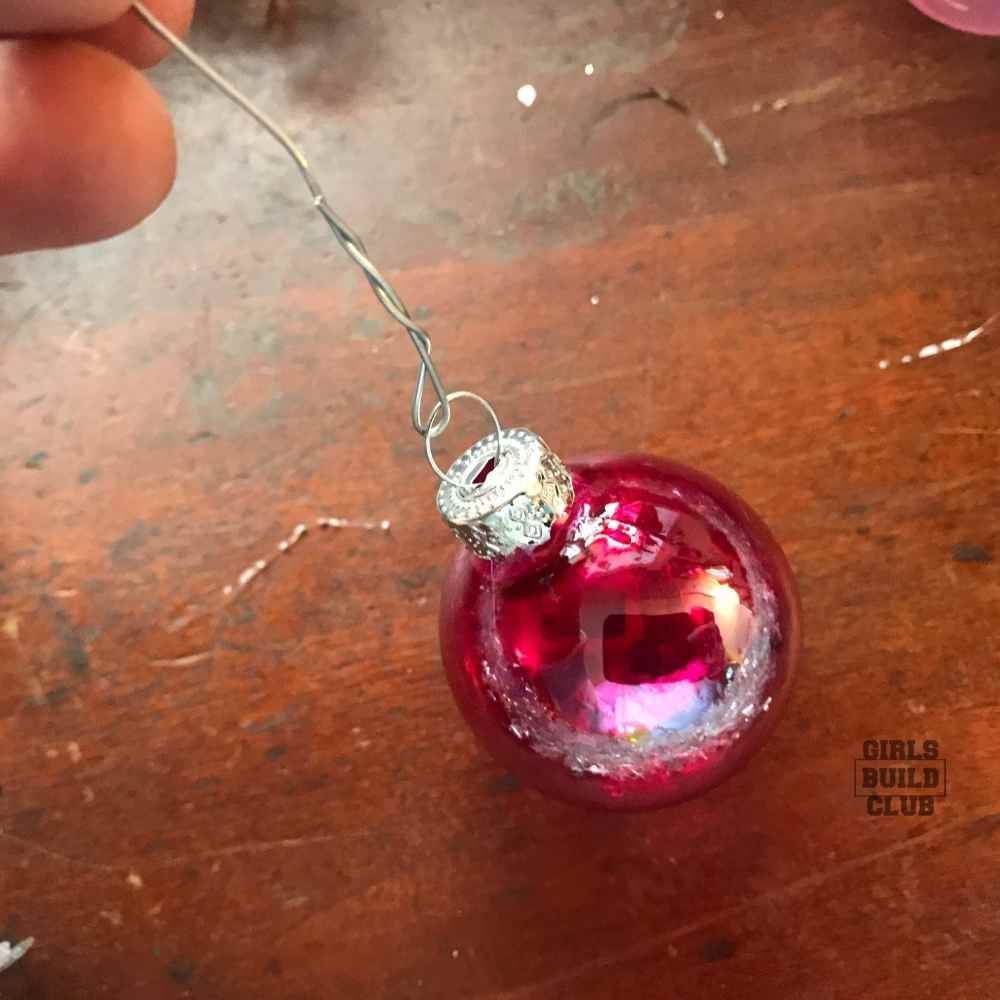
You can use floral wire for this or string or whatever is easiest for you! You just need something you can use to attach the ornament.
Then I planned out the spacing of the ornaments along the DIY Vintage Christmas Wreath before I started attaching them.
I also tried to arrange the colors so there was as much variety as possible.
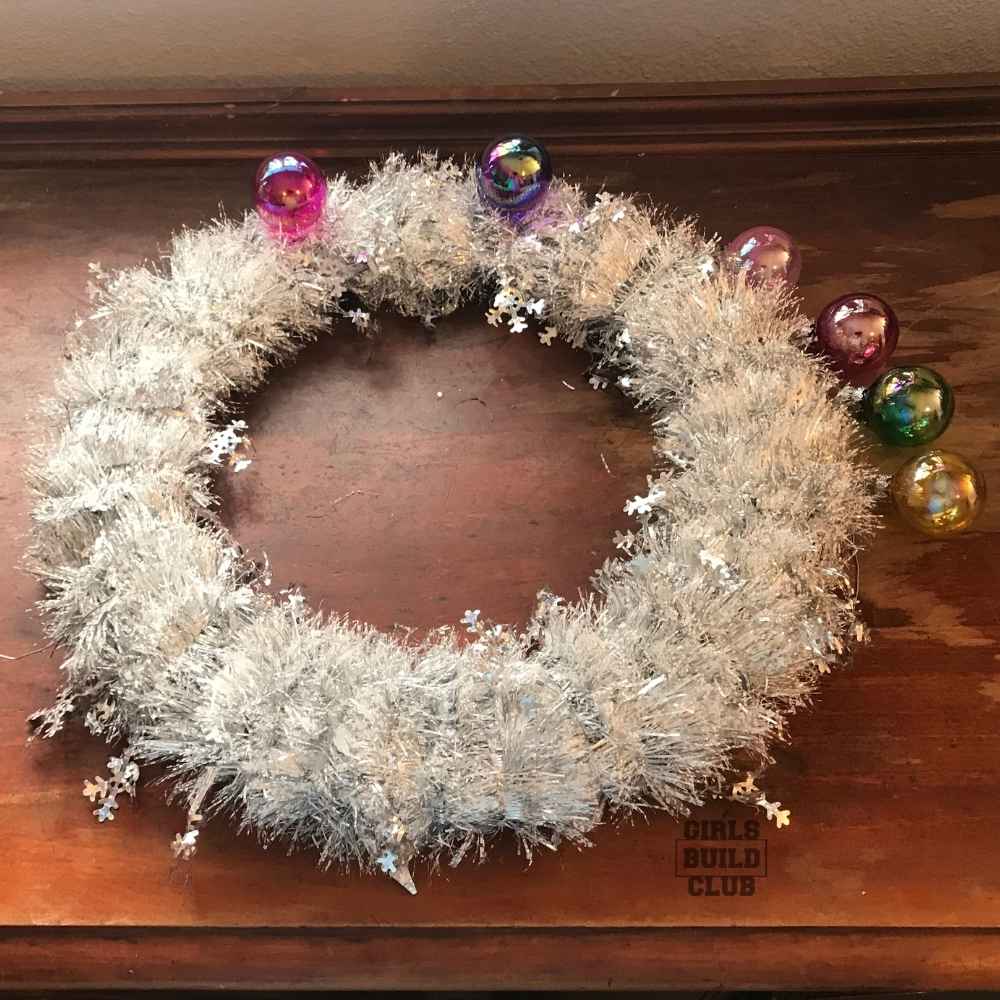
Once you’re happy with the spacing and color arrangement, start attaching the ornaments.
I poked the ornament wire through from the front of the wreath all the way to the back of the wreath, then wrapped the wire around the front tightly. But the wire is hidden amongst the fluffy tinsel so it’s invisible.
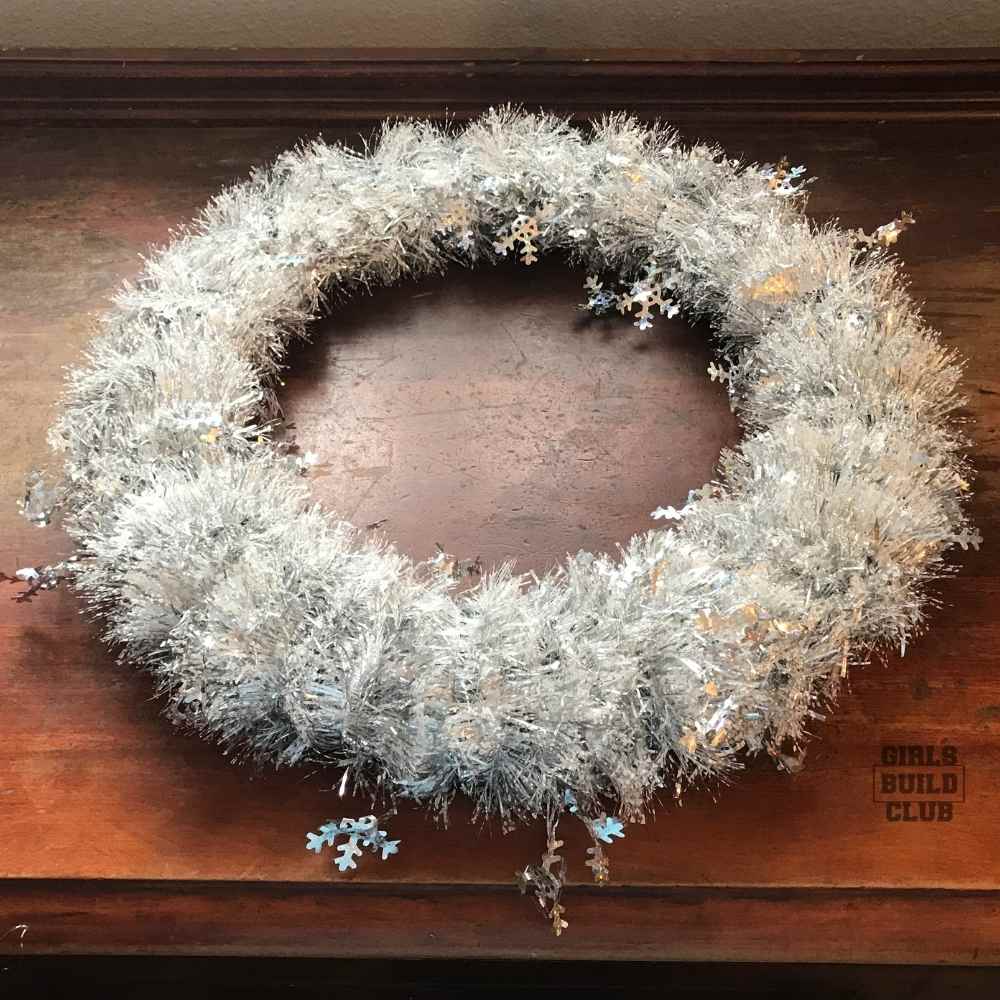
4. Add the Focal Point Snowflake
Honestly, I think the wreath is pretty enough at this point! You could stop here without adding the snowflake. Or maybe there’s a different focal point you’d like to add instead?
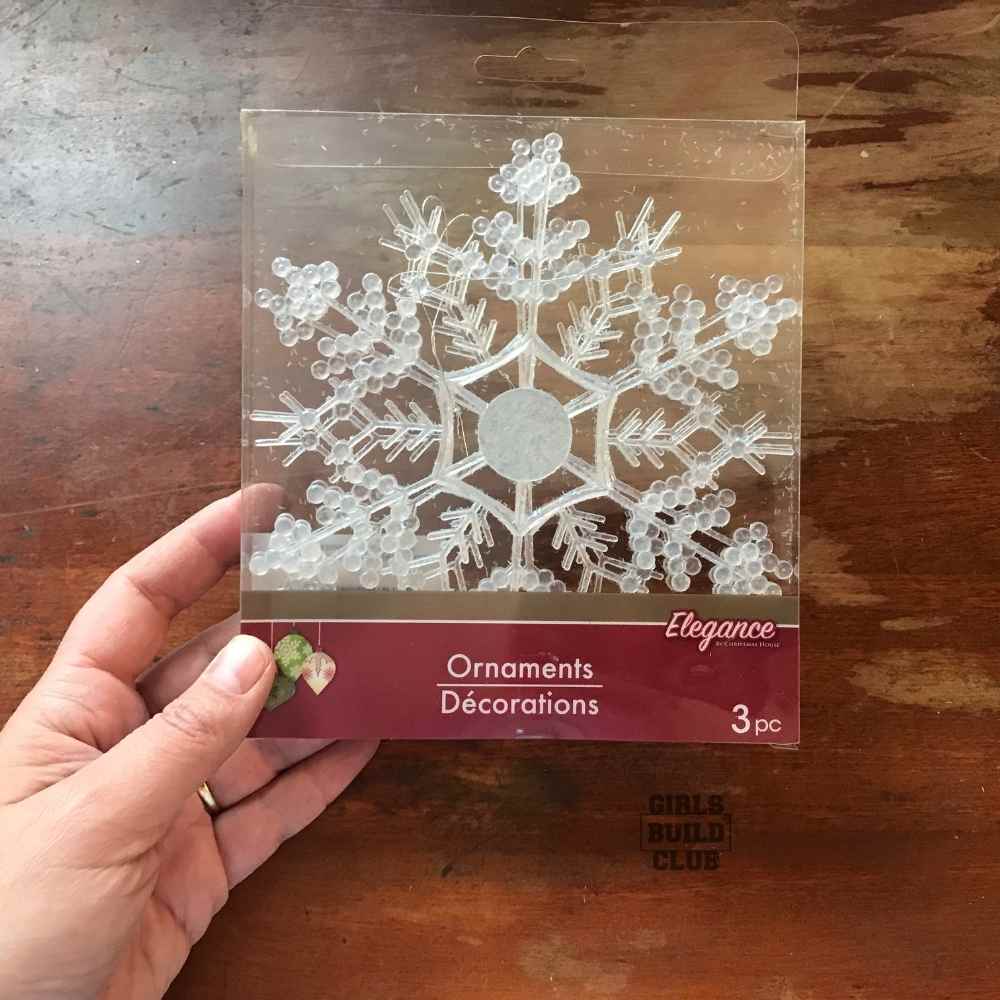
I love snow, and for me the transparent snowflake was the perfect finishing touch to this DIY Vintage Christmas Wreath.
Once again, I just secured it with a bit of wire at the top of the wreath, and set the length so it was centered inside the wreath.

5. Hang it Up and Enjoy!
I think this is going on our front door. I can’t decide. Just put it somewhere you’ll see it often and be able to admire your handiwork.
Congrats, you’re done! And you have a beautiful vintage-style Christmas wreath that you made yourself for under $10! That’s awesome!
6. Additional Ideas
- Add some tiny fairly lights.
- Use a different focal point instead of the snowflake?
- Save a couple bucks by using a pack of Dollar Tree ornaments instead of the Walmart ones. (Oh but I’m really happy with my vintage-style ornaments from Walmart!)
- Instead of silver tinsel, use a different color….or faux pine needle branches.
- Use solar fairy lights and hang it on your front door.
I would love to see your photos if you make this wreath! Especially if you put your own twist and style on it.
If you’d like more projects like this, feel free to Join Girls Build Club below. I don’t ever share your email with anyone for any reason.
Leave a Reply